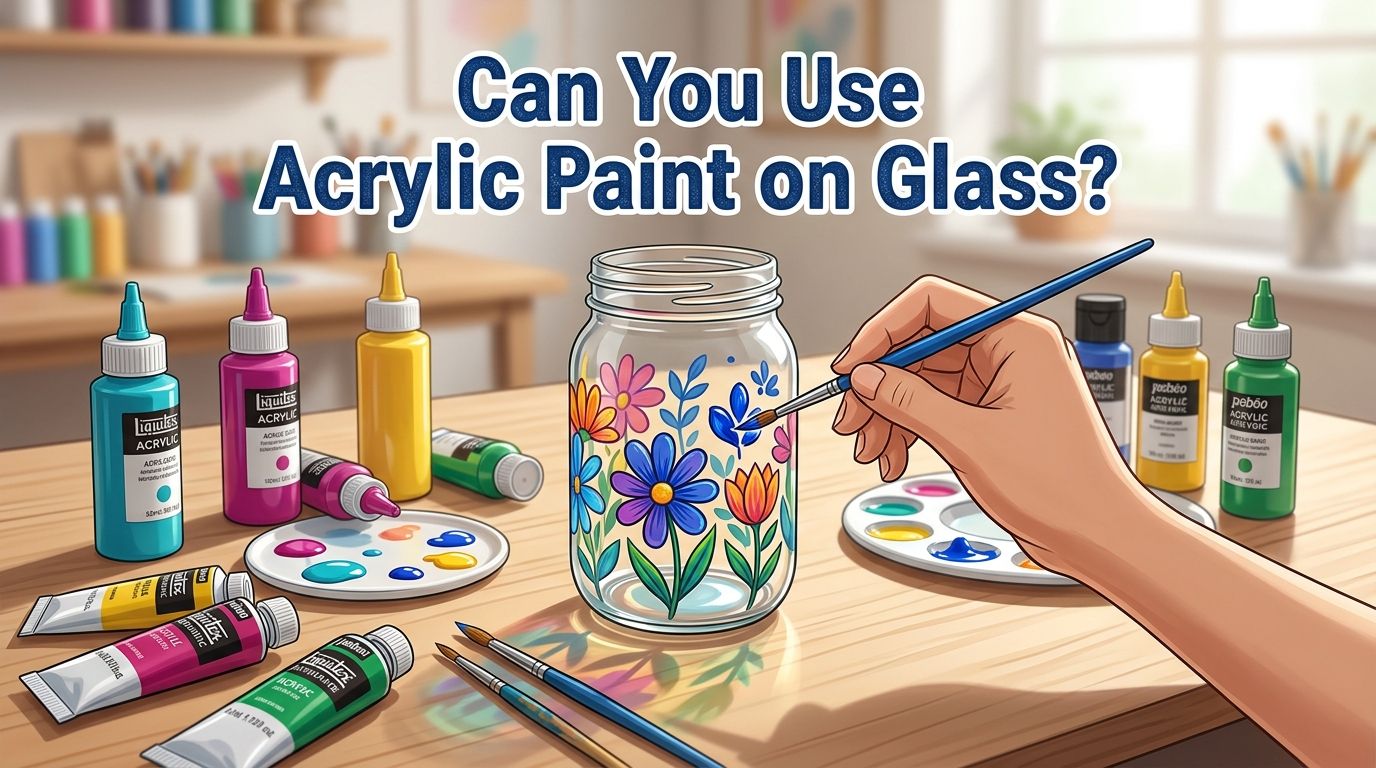
Can You Use Acrylic Paint on Glass? A Complete Guide
Have you ever picked up a glass jar or an old window and wondered if you could turn it into a piece of art with acrylic paint? You are not alone. Thousands of crafters and DIY enthusiasts ask this question every single day.
The short answer is yes, you can use acrylic paint on glass. But there is a catch. Glass is a smooth, nonporous surface. Standard acrylic paint does not stick to it easily. Without proper preparation and sealing, your beautiful design will peel, chip, or wash right off.
This guide walks you through everything you need to know. You will learn how to prepare glass, choose the right paint, apply it correctly, and seal it so your work lasts.
Key Takeaways
- Acrylic paint works on glass, but only with the right preparation. Glass is nonporous, which means paint sits on the surface instead of soaking in. You must clean, prime, and seal the glass for the paint to stick and last.
- Surface preparation is the most important step. Clean the glass with rubbing alcohol to remove oils, dust, and fingerprints. Skipping this step is the number one reason paint peels off glass.
- Enamel based acrylic paints perform better on glass than regular acrylics. These paints are formulated for hard, slick surfaces and create a stronger bond with glass. Regular craft acrylics can work, but they need more help sticking.
- Sealing your painted glass is not optional. A clear acrylic spray sealer or a brush on varnish protects your design from scratches, moisture, and everyday wear. Without a sealant, your paint will not survive handling.
- Baking painted glass in an oven can make the paint permanent. Place the glass in a cool oven, heat it to 350°F, bake for 30 minutes, and let it cool inside the oven. This curing process bonds the paint to the surface.
- Thin layers always outperform thick coats. Multiple thin coats of paint create a smoother, more durable finish than one heavy layer. Thick paint is more likely to crack and peel over time.
Why Acrylic Paint Does Not Naturally Stick to Glass
Glass has a completely smooth and nonporous surface. Acrylic paint is water based and relies on absorption to bond with a surface. When you paint on canvas or wood, the paint seeps into tiny pores and grips the material. Glass does not have those pores.
This means the paint just sits on top of the glass like a film. You can often peel it right off with your fingernail once it dries. Temperature changes, moisture, and regular handling make the problem worse.
The good news is that this challenge has clear solutions. Cleaning, priming, using the right paint type, and sealing all work together to create a bond that holds. Understanding why paint struggles on glass helps you take the right steps before you even open a paint bottle.
How to Properly Clean Glass Before Painting
Cleaning is the foundation of every successful glass painting project. Even glass that looks clean has invisible oils, dust, and residue on its surface. Fingerprints alone can prevent paint from sticking in certain spots.
Start by washing the glass with warm soapy water. Rinse it well and let it dry completely. Then wipe the entire surface with rubbing alcohol (isopropyl alcohol) using a lint free cloth or paper towel. The alcohol removes any remaining grease or film.
After cleaning, avoid touching the glass with your bare hands. Hold it by the edges or wear clean cotton gloves. This step takes only a few minutes but makes a dramatic difference in how well the paint adheres. Many experienced glass painters say that 90% of peeling problems come from poor surface preparation.
Choosing the Right Type of Acrylic Paint for Glass
Not all acrylic paints are equal for glass projects. Standard craft acrylics can work, but they are not the best choice. Enamel based acrylic paints are specifically formulated for hard, nonporous surfaces like glass, ceramic, and metal.
Enamel acrylics dry harder and create a glossy, durable finish. They bond to glass better than regular soft body acrylics. Many popular craft paint brands offer enamel or “multi surface” versions that work well on glass.
Regular acrylic paint is softer and more flexible after drying. It works fine if you prime the glass first and seal the finished piece. However, it will never be as durable as enamel acrylic without those extra steps.
Pros of Enamel Acrylic Paint: stronger adhesion to glass, harder finish, more durable, often dishwasher safe after curing. Cons of Enamel Acrylic Paint: slightly higher cost, fewer color options, longer drying time in some cases.
Pros of Regular Acrylic Paint: widely available, inexpensive, huge color range. Cons of Regular Acrylic Paint: peels easily without primer and sealant, softer finish, less water resistant on glass.
Should You Prime Glass Before Painting?
Priming creates a surface that acrylic paint can actually grip. On glass, a primer acts like a bridge between the slick surface and the paint layer. Using a primer significantly reduces peeling and chipping.
You have several primer options. A clear acrylic spray primer works well and does not change the color of your glass. A white spray primer provides a solid base that makes colors appear more vibrant. Some artists also use fine grit sandpaper (220 grit or higher) to lightly scuff the glass surface before painting.
Sanding creates tiny scratches that give the paint something to hold onto. This method works best on flat glass surfaces. For curved items like wine glasses or jars, spray primer is easier and more even. A combination of light sanding followed by a thin primer coat gives the strongest results.
Pros of Priming: better paint adhesion, less peeling, more vibrant colors on opaque primers. Cons of Priming: adds an extra step and drying time, may change the transparency of the glass.
Step by Step Guide to Painting Glass with Acrylics
Follow these steps for the best results on any glass surface. Each step matters, so do not skip ahead.
Step 1: Clean the glass thoroughly with soap, water, and rubbing alcohol. Let it dry.
Step 2: Apply a thin, even coat of primer if you are using regular acrylic paint. Let the primer dry for at least 30 minutes.
Step 3: Plan your design. You can sketch it on paper first or use painter’s tape to create clean lines. Stencils also work well for beginners.
Step 4: Apply thin layers of acrylic paint using a soft brush or a sponge dauber. A sponge reduces brush strokes and creates an even texture. Let each layer dry before adding the next.
Step 5: Build up your design with two to three thin coats. This approach creates a smoother and more durable finish than one thick coat.
Step 6: Let the final coat dry for at least 24 hours before sealing. Patience here prevents smudging and uneven sealer application. The full process takes time, but the results are worth the wait.
How to Seal Acrylic Paint on Glass
Sealing is what makes your painted glass project last. Without a sealant, the paint remains vulnerable to scratches, water, and everyday contact. A good seal turns a fragile paint layer into a durable finish.
Clear acrylic spray sealer is the easiest option. Hold the can about 10 to 12 inches from the surface and apply a thin, even coat. Let it dry for 15 minutes and apply a second coat. Two to three light coats provide the best protection.
Brush on sealers and varnishes also work. Choose a product labeled for use on glass or multi surface applications. Apply with a soft, wide brush in smooth strokes. Avoid going over the same area too many times or you may lift the paint beneath.
Pros of Spray Sealer: fast application, even coverage, minimal brush marks. Cons of Spray Sealer: must be used in a ventilated area, harder to control on small details.
Pros of Brush On Sealer: precise application, better for small projects. Cons of Brush On Sealer: can leave brush marks, slower to apply.
The Oven Baking Method for Permanent Results
Baking painted glass in a regular kitchen oven is one of the best ways to make the paint permanent. Heat curing bonds the paint to the glass at a molecular level, creating a finish that resists washing and handling.
Here is the correct method. Place your painted glass on a baking sheet and put it in a cool oven. This is critical. Never place glass in a preheated oven because the sudden temperature change can crack or shatter the glass.
Turn the oven to 350°F (180°C). Once it reaches temperature, set a timer for 30 minutes. After 30 minutes, turn the oven off and leave the glass inside until the oven cools completely. This gradual cooling prevents thermal shock.
Not all paints are suitable for baking. Check the label of your acrylic or enamel paint to confirm it is oven safe. Most acrylic enamel craft paints support oven curing. After baking, many painted glasses become top rack dishwasher safe, though hand washing is still gentler on the finish.
Best Techniques for Painting Glass Evenly
Getting a smooth, even coat on glass takes a little practice. The biggest mistake beginners make is applying paint too thickly. Thick paint runs, drips, and creates an uneven texture that looks messy.
Use a flat soft bristle brush for large areas and a small round brush for details. Sponge daubers are excellent for base coats because they create a stippled texture that minimizes brush strokes. Load your brush or sponge with a small amount of paint and apply it in one direction.
Let each thin coat dry completely before adding the next. This usually takes 15 to 30 minutes depending on humidity and paint thickness. If you see streaks after the first coat, do not panic. The second and third coats will even everything out. Working in thin layers also gives you more control over color intensity and opacity.
Creative Project Ideas for Painted Glass
Painted glass opens up a wide range of creative possibilities. Mason jars make beautiful painted candle holders, flower vases, and storage containers. A few coats of acrylic paint in your favorite color can transform a plain jar into a stunning centerpiece.
Wine glasses are popular items for personalized gifts. Paint the stem or the base and leave the rim area clear for safe drinking. Always keep paint away from any surface that touches food or lips.
Old picture frames with glass inserts can become decorative art panels. Paint directly on the glass and display it with light behind it for a stained glass effect. Glass ornaments, window panes, mirrors, and glass tiles are all great surfaces for this craft.
Seasonal decorations are another fun project. Paint pumpkins on glass jars for autumn. Add snowflakes to glass vases for winter. The possibilities grow as your confidence and skill increase.
Common Mistakes and How to Avoid Them
Skipping the cleaning step is the most common mistake. Oil and dust create invisible barriers that prevent paint from bonding. Always clean with rubbing alcohol before you start.
Applying paint too thick causes cracking, bubbling, and peeling. Use multiple thin coats instead of one heavy layer. Each thin coat dries faster and bonds better to the layer beneath it.
Touching the glass with bare hands after cleaning reintroduces oils. Wear gloves or hold the glass by unpainted edges. Forgetting to seal the finished piece leaves your work exposed to damage. Every painted glass project needs a proper sealant.
Placing glass in a hot oven for baking can cause it to crack or explode. Always start with a cold oven and allow gradual heating and cooling. Rushing the drying process by using a hair dryer or placing the glass in direct sunlight can also cause the paint to crack.
How Long Does Acrylic Paint Last on Glass?
The lifespan of acrylic paint on glass depends entirely on your preparation and sealing methods. Properly cleaned, primed, painted, and sealed glass can hold its paint for years. Baked glass projects tend to last even longer because the heat creates a permanent bond.
Without sealing, acrylic paint on glass may start peeling within days or weeks. Regular handling, moisture exposure, and temperature changes speed up the process. Items that are washed frequently, like drinking glasses, need enamel paint and oven curing for the best durability.
Decorative items that sit on a shelf and are rarely touched can last a very long time even with regular acrylic paint and spray sealer. The key is matching your paint and sealing method to how the item will be used. High use items need enamel paint plus baking. Low use items do well with regular acrylic plus spray sealer.
Tips for Painting Glass Windows and Large Surfaces
Painting glass windows requires a slightly different approach than small glass objects. Large flat surfaces show imperfections more clearly, so preparation and technique matter even more.
Use painter’s tape to create crisp borders and geometric designs. For freehand painting on windows, work from top to bottom to avoid smudging. Acrylic paint pens are great for writing text or drawing fine details on window glass because they offer more control than a brush.
Temporary window art, like holiday decorations, can be done with regular acrylic paint. It peels off easily from untreated glass when you want to remove it. For permanent window painting, clean the glass, apply primer, use enamel acrylic paint, and seal with a UV resistant varnish. UV protection is important for windows because sunlight fades colors over time. Reapply UV varnish once a year for the best protection.
Frequently Asked Questions
Will acrylic paint wash off glass?
Yes, regular acrylic paint will wash off untreated glass with water and a little scrubbing. It does not bond to smooth glass on its own. To make it stay, you need to clean the glass, apply primer, use the right paint, and seal the finished piece. Oven baking also helps make the paint permanent and water resistant.
Can you use acrylic paint on glass drinking glasses?
You can, but you must keep paint away from the rim and any surface that contacts food or drinks. Use enamel acrylic paint and cure it in the oven at 350°F for 30 minutes. Paint the stem, base, or exterior lower portion of the glass. Always check that your paint is labeled as nontoxic and food safe when cured.
Do you need special paint for glass?
You do not need special glass paint, but enamel based acrylic paints work much better on glass than standard acrylics. Multi surface acrylic paints are also a solid choice. Regular craft acrylics can work if you prime the glass first and seal the finished project properly.
How many coats of acrylic paint should you use on glass?
Two to three thin coats give the best results. Thin layers dry faster, bond better, and create a smoother finish. Let each coat dry for 15 to 30 minutes before applying the next. Avoid applying one thick coat because it is more likely to crack, peel, or run.
Can you fix peeling acrylic paint on glass?
You can sometimes fix small areas by gently sanding the peeling section and repainting. For large areas of peeling, it is usually better to remove all the paint, clean the glass again, and start over with proper preparation. Soaking the glass in warm soapy water helps loosen old acrylic paint for easy removal.

Hi, I’m Zoe Ward, the creator and voice behind Fine Brush Vault. I’m passionate about art, painting, and exploring the world of colors. I spend my time testing and reviewing art supplies to help fellow creators find the best tools for their craft. Through honest reviews and detailed guides, my goal is to make your creative journey easier and more inspiring.