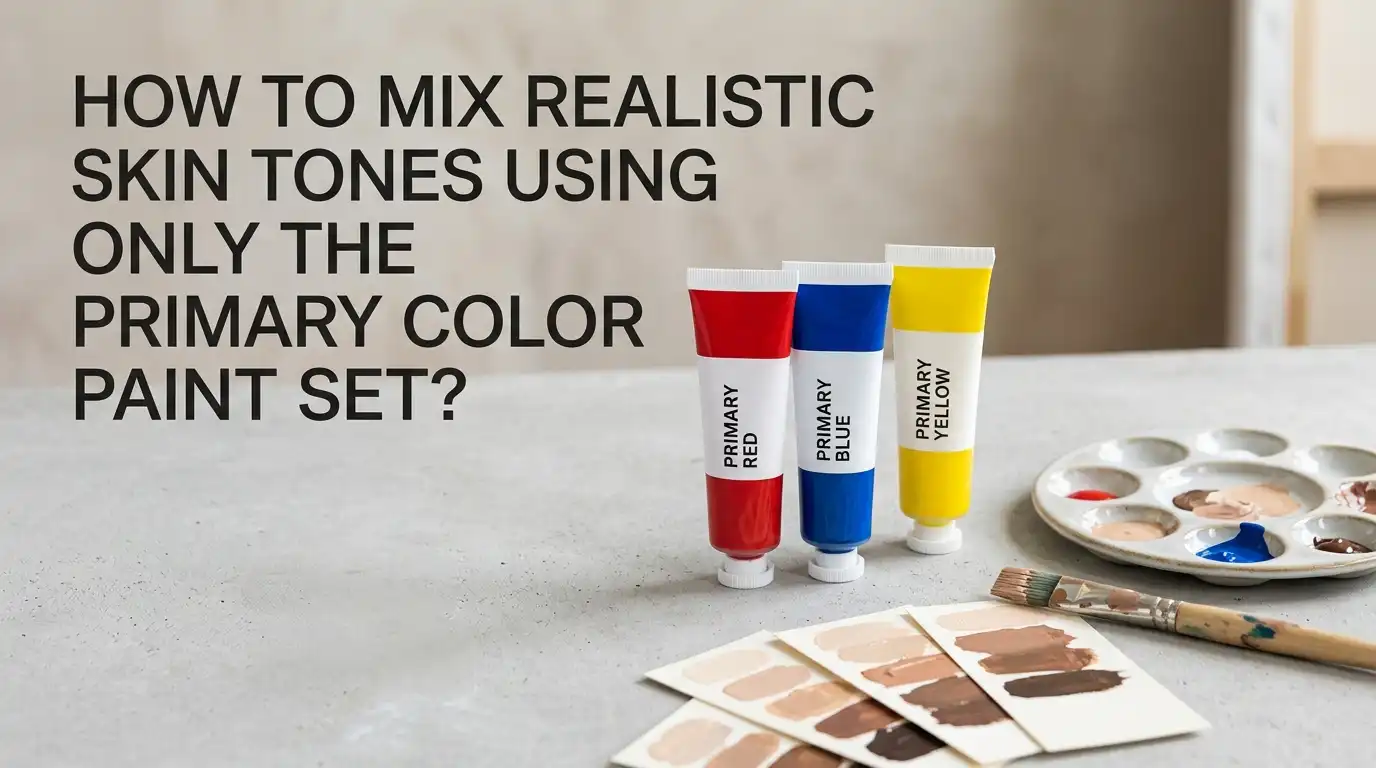
How to Mix Realistic Skin Tones Using Only the Primary Color Paint Set?
Painting skin can feel tricky, especially when you only have red, yellow, and blue in your kit. Many beginners reach for premixed flesh tubes, but those rarely match real skin.
The good news is that you can mix every skin tone in existence using just three primary colors plus white. This guide will walk you through the exact steps, ratios, and tricks that artists use to get lifelike results.
You will learn how to handle warm tones, cool tones, shadows, and highlights without buying extra paint. By the end, you will feel confident mixing any complexion from the lightest porcelain to the deepest mahogany.
Key Takeaways
- Orange is your base. Every skin tone starts as a mix of red and yellow. White then lightens it, and a tiny touch of blue cools it down or shifts it toward shadow.
- Skin is never just peach. Real flesh contains subtle greens, purples, and grays. You build these by adding complementary colors in tiny amounts.
- Use the complementary rule for corrections. If your mix looks too red, add a hint of green (yellow plus blue). Too yellow, add purple. Too blue, add orange.
- Avoid chalky results. Adding too much white kills the life in skin. Instead, use a pale yellow base and add white gradually for highlights.
- Mix in bigger batches. Skin tones are hard to match again, so prepare enough base mixture for the whole painting before starting.
- Test on a swatch. Always brush a sample on white paper next to your reference before committing to the canvas.
Why Primary Colors Are Enough for Any Skin Tone
You might think you need ten tubes of flesh paint to capture real skin. You do not. All skin tones, from the palest to the darkest, sit on the orange spectrum with shifts toward red, yellow, brown, or violet. Since orange itself comes from red plus yellow, the primary set already holds the full range.
Blue plays a quiet but powerful role. It darkens, cools, and adds the gray undertones found in shadows and aging skin. White lifts the value for highlights and lighter complexions. With these four jars, your control over color is almost unlimited.
Pros: Affordable, portable, and forces you to learn color theory deeply.
Cons: Takes more time to mix, and matching the exact tone twice can be hard for beginners.
Understanding the Color Theory Behind Skin
Skin is translucent. Light bounces under the surface and picks up color from blood, fat, and bone. That is why we see pinks, yellows, and even subtle greens in a single face. Knowing this helps you mix smarter.
The color wheel is your best friend here. Red and green are opposites, yellow and purple are opposites, and blue and orange are opposites. Opposite colors neutralize each other. This rule lets you tone down any mix that looks too bright or unnatural.
Skin tones live in the warm half of the wheel but lean cooler in shadow areas. Cheeks, ears, and noses often carry more red. Foreheads and chins often carry more yellow. Eye sockets and jaws often carry more blue or green.
Setting Up Your Palette the Right Way
Start with a clean palette and squeeze out generous amounts of red, yellow, blue, and white. Place them in a row with white at the end so you always know which pile is which. Keep a damp cloth nearby to wipe your brush between mixes.
Use a palette knife instead of a brush for mixing. A knife gives you cleaner, more even colors and saves your bristles. Mix on a flat surface, not in a well, so you can see the true color.
Pros of a structured palette: Faster workflow, fewer muddy accidents, and easier color matching.
Cons: Takes a few minutes of setup before each painting session and uses more paint at once.
Step One: Mix a Base Orange
Your skin tone journey begins with orange. Squeeze a small dab of red and yellow onto your palette, then blend them with a palette knife. The ratio matters more than you think.
For light to medium skin, use about two parts yellow to one part red. This makes a warm peachy orange. For darker skin, use more red than yellow, leaning into a deep burnt orange. For olive or tan skin, keep the orange neutral, then add a small touch of blue to shift it slightly cooler.
Always mix more than you think you need. Skin tones touch every part of a face, so running out halfway is frustrating and rematching is hard.
Step Two: Add White Slowly for Lighter Tones
Once your base orange looks right, start adding white in small amounts. Never dump white in all at once. Add a pea sized amount, mix fully, then check the value against your reference photo or model.
For pale European skin, you might need a lot of white plus a hint of extra yellow. For medium Mediterranean or Latin tones, use less white and keep the orange more visible. For darker skin, you may barely use white at all in your base, saving it only for highlight areas.
Pros of building light gradually: You get smoother gradations and avoid the chalky pastel look.
Cons: Slower process, and it is easy to overshoot if you rush.
Step Three: Cool the Mix With a Touch of Blue
Pure orange and white alone look like plastic. Real skin always has a touch of gray or green undertone. This is where blue comes in. Dip just the tip of your knife into the blue pile and stir it into your orange and white mix.
Blue plus orange creates a neutral brown or gray. Adding just a hair of blue takes the candy color out of your base and makes it feel like real flesh. For most light skin tones, the ratio of blue to base mix is tiny, almost invisible.
For darker skin tones, you can add more blue, which deepens and enriches the brown. Be patient and add in stages.
Mixing Light Skin Tones Step by Step
For very light skin, start with a base of yellow plus a small touch of red, then add a generous amount of white. The mix should look like pale peach cream. Add a tiny speck of blue to neutralize the brightness.
If the result still looks too pink, add a drop more yellow. If it looks too yellow, add a drop more red and a hair of blue. Test the swatch on white paper to see the true value.
Pros: Easy to achieve with mostly white and small accents of color.
Cons: Light tones show every mistake, so muddiness from dirty brushes shows up fast. Clean your knife often.
Mixing Medium Skin Tones Step by Step
Medium skin tones, like olive, tan, and golden complexions, need a stronger orange base. Mix equal parts red and yellow first, then add white sparingly. The mix should look like terracotta or peach clay.
Add blue in slightly larger amounts than you would for light skin. This grounds the tone and gives it that warm sun kissed quality. A small touch of extra yellow brings out the golden undertone common in Mediterranean, South Asian, and Latin American skin.
If you want a more olive look, add a hint more blue or even a touch of green made from yellow plus blue. Test as you go and adjust slowly.
Mixing Dark Skin Tones Step by Step
Dark skin is rich, complex, and beautiful. Start with a strong orange leaning red, using two parts red to one part yellow. Then add a meaningful amount of blue to deepen the color into a warm brown.
For very deep tones, keep adding red and blue until you reach a dark chocolate or mahogany shade. Do not add white until the very end, and even then only for highlights on cheekbones, the nose, or the forehead.
Dark skin reflects light beautifully, so highlights often carry hints of cool blue or even violet. Mix these separately on the palette rather than diluting your base.
Pros: Rich, glowing results that feel alive.
Cons: Requires patience and several thin layers to build depth.
Creating Shadows Without Black Paint
You do not need black in your primary set to make shadows. In fact, black often makes skin look dead and flat. Instead, mix shadows by adding more blue and a bit of red to your base skin tone.
This creates a deep purplish brown that feels natural and warm. For very cool shadows, like under the jaw or inside the nostrils, lean more on the blue. For warmer shadows, like the side of the nose, lean more on the red.
Pros: Shadows stay vibrant and lifelike.
Cons: Takes practice to judge how dark to go without crossing into muddy territory.
Adding Highlights That Look Natural
Highlights are not just white. Pure white highlights look chalky and cartoonish. Instead, mix a small amount of your base skin tone with a larger amount of white, then add a tiny drop of yellow for warmth.
For cooler highlight areas, like the top of the forehead under a bright sky, add a hint of blue instead. This mimics how light actually behaves on real skin.
Apply highlights last and in thin layers. Build them up gradually so the transitions stay smooth. Sharp highlights only belong on the brightest spots, like the tip of the nose or the high point of the cheekbone.
Fixing Muddy or Chalky Mixes
Even experienced artists run into muddy or chalky skin tones. The fix lies in the complementary color rule. If your mix looks too red, add a tiny bit of green. If it looks too orange, add blue. If it looks too yellow, add a touch of purple, which you make by mixing red and blue.
If your mix looks chalky, you probably added too much white. Rescue it by adding a small amount of yellow or red to bring back warmth. Then test on white paper.
Pros of the complementary fix: Saves paint and teaches you color theory fast.
Cons: Overcorrecting can lead to gray sludge, so add tiny amounts at a time.
Practical Tips for Better Skin Tone Mixing
Always paint with a reference photo or live model nearby. Skin tones look different in your head than on the canvas, and references keep you honest. Squint at the reference to simplify the values and undertones.
Mix in natural daylight whenever possible. Indoor lights, especially yellow bulbs, will trick your eyes and make your skin tones look wrong once you step outside the studio.
Keep your brushes and water clean. Dirty water is the number one cause of muddy skin tones, especially with acrylics and watercolors. Change the water often and wipe your knife between mixes.
FAQs
Can I really mix every skin tone with only red, yellow, blue, and white?
Yes, absolutely. Every skin tone falls within the orange to brown range of the color wheel. With these four colors, you can create warm, cool, light, medium, and dark complexions by adjusting ratios and adding small complementary touches.
Why does my skin tone always look orange or pink?
You probably have too much red or yellow and not enough blue. Add a tiny drop of blue to neutralize the warmth. Blue plus orange creates a natural brown, which is closer to actual skin.
Should I use black to make shadows on skin?
No, avoid black for skin shadows. Black flattens the color and makes it look lifeless. Instead, mix shadows with more blue and red in your base tone for a richer, more natural depth.
What if I do not have white in my primary set?
If you only have red, yellow, and blue, you can still mix darker skin tones easily. For lighter skin, you will need to dilute with water or medium, but a tube of white is strongly recommended for full flexibility.
How do I match a skin tone I mixed yesterday?
Mix larger batches than you think you need and store leftovers in a sealed container or airtight palette. Matching exactly is hard, so prepare enough base color for the entire painting before you start.
Does this method work for acrylic, oil, and watercolor?
Yes, the color theory stays the same across all paint types. The only differences are drying times and how much water or medium you use. Oils blend longer, acrylics dry fast, and watercolors rely on dilution rather than white for lighter tones.
Hi, I’m Zoe Ward, the creator and voice behind Fine Brush Vault. I’m passionate about art, painting, and exploring the world of colors. I spend my time testing and reviewing art supplies to help fellow creators find the best tools for their craft. Through honest reviews and detailed guides, my goal is to make your creative journey easier and more inspiring.