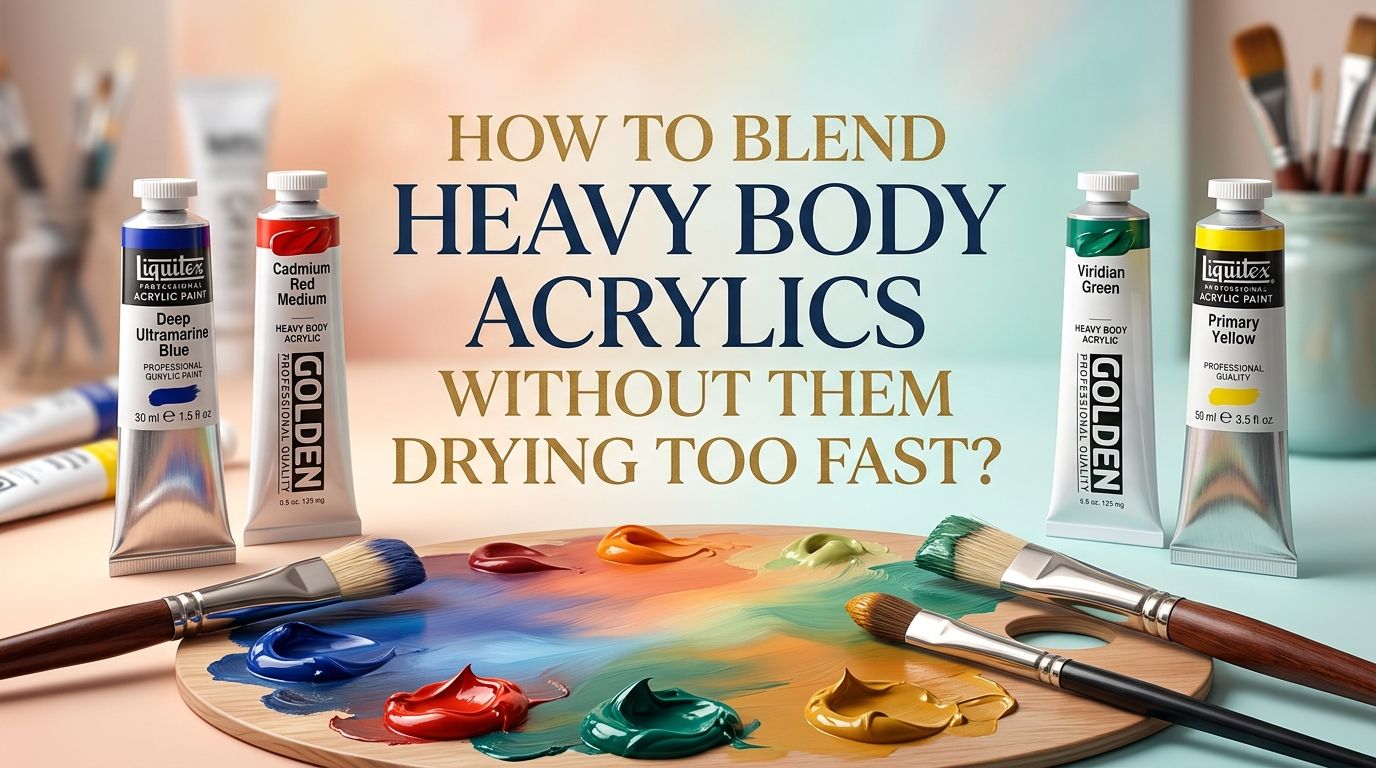
How to Blend Heavy Body Acrylics Without Them Drying Too Fast?
Heavy body acrylics are thick, buttery, and packed with pigment. Artists love them for bold strokes and impasto textures.
But the moment you try to blend two colors on canvas, the paint starts to set up. You have maybe two to five minutes before the surface becomes tacky and unworkable. The result? Patchy transitions, visible lines, and a lot of frustration.
The good news is this problem has real, practical solutions. From retarder mediums and wet palettes to glazing techniques and room adjustments, you can stretch your working time and get smooth, seamless blends every single time.
In a Nutshell
- Retarder medium is your best friend. Adding a small amount (around 10% to 15% of your paint volume) slows the drying time significantly. It gives you extra minutes for blending, but you should avoid adding too much or the paint may turn gummy and never fully cure.
- A wet palette keeps paint fresh for hours. It uses a damp sponge and semi permeable paper to feed moisture into your paint from below. This means less wasted paint and longer working sessions without constant re squeezing from tubes.
- Misting the canvas with water extends working time. A fine mist spray bottle can keep your paint surface damp just long enough to blend. Be careful not to oversaturate, as too much water can cause the paint to run and weaken adhesion.
- Glazing offers a dry layer alternative to wet blending. Instead of fighting the drying time, you can apply thin, transparent layers over dried paint. Each layer shifts the color slightly, creating smooth visual blends without needing the paint to stay wet.
- Your painting environment matters more than you think. A hot, dry room causes acrylics to dry even faster. Painting in a space with temperatures between 65°F and 75°F and humidity above 40% gives you noticeably more open time.
- Working in smaller sections is a simple but powerful fix. Instead of loading paint over a large area, focus on blending one small zone at a time. This reduces the race against the clock and gives you more control over your transitions.
Why Do Heavy Body Acrylics Dry So Fast
Heavy body acrylics dry through water evaporation. The acrylic polymer binder holds pigment particles together, and as the water evaporates, the polymer chains lock into place. This process happens fast because acrylic paint films are thin relative to the amount of water they contain.
Heavy body acrylics are especially prone to quick drying because of their thick consistency. When spread on canvas, the thin outer layer loses moisture rapidly, forming a skin. The paint beneath may still be soft, but the surface becomes unusable for blending.
Environmental factors speed this up even further. Low humidity, warm room temperatures, and direct airflow from fans or open windows all increase the evaporation rate. Even the absorbency of your canvas plays a role. A highly absorbent surface pulls moisture out of the paint faster, cutting your blending window short.
Use a Retarder Medium to Slow Drying Time
Retarder medium is a liquid additive that slows the evaporation rate of water in acrylic paint. Most retarders contain propylene glycol, which holds onto moisture longer than water alone. You mix it directly into your paint before applying it to the canvas.
The recommended ratio is 10% to 15% retarder by volume. For example, if you squeeze out a marble sized amount of paint, add a small drop of retarder and mix well. Some brands can slow drying time by up to 40%, giving you significantly more blending time.
Pros: Easy to use, affordable, and effective. It extends working time without drastically changing the paint’s texture or color.
Cons: Adding too much retarder (over 15%) can make the paint sticky and prevent it from curing properly. The paint may also feel slightly softer once dry.
Try Open Acrylics or Mix Them with Heavy Body Paint
Open acrylics are a specific type of acrylic paint formulated for extended working time. They can stay wet and blendable for up to 10 times longer than standard acrylics. This makes them ideal for artists who want the slow drying properties of oil paint without switching mediums.
You do not have to replace your entire paint collection. A practical approach is to mix open acrylics with your heavy body paints. This extends the drying time of the heavy body paint while keeping its thick, buttery texture. You can also use open medium as an additive to achieve a similar effect.
Pros: Gives you a significantly longer working window. The paint remains blendable for many minutes. Great for large area transitions and portrait work.
Cons: Open acrylics can feel different under the brush. They take longer to build up layers. They also tend to cost more per tube than standard heavy body paints.
Set Up a Wet Palette for Your Workspace
A wet palette is a container with a damp sponge at the bottom and a sheet of semi permeable palette paper on top. You place your paint on the paper, and the moisture from the sponge slowly feeds into the paint from below. This keeps the paint fresh and workable for hours, even overnight if you seal the container.
To make a simple wet palette at home, place a folded damp paper towel inside a shallow container and lay a piece of parchment paper on top. Squeeze your heavy body acrylics onto the parchment paper and close the lid between painting sessions.
Pros: Saves paint, extends working time on the palette dramatically, and is easy to build yourself. Perfect for long sessions.
Cons: The moisture can thin out your paint slightly over time. Heavy body acrylics may lose some of their thick consistency after sitting on a wet palette for several hours.
Mist Your Canvas with a Fine Spray Bottle
A simple spray bottle filled with clean water is one of the easiest tools to keep paint workable on the canvas. Before you begin blending, give the area a light mist from about 12 inches away. This adds a thin layer of moisture that slows down surface drying.
You can also mist the paint on your palette to keep it fresh while you work. The key is to use a bottle that produces a very fine mist, not heavy droplets. Heavy drops of water can dilute your paint and cause it to run or lose adhesion on the canvas surface.
Pros: Extremely cheap, fast, and easy. Requires no special supplies beyond a spray bottle. Works well alongside other methods like retarder.
Cons: Overspraying can cause paint to become too thin and run. It also adds only a short extension to working time, usually a few extra minutes at most.
Work in Small Sections for Better Control
One of the most practical solutions does not require any special products at all. Instead of applying paint to a large area and trying to blend everything at once, work in small sections. Focus on a patch of canvas that you can comfortably blend in two to three minutes.
Place your two colors side by side in a small zone. Use a clean, slightly damp brush to sweep back and forth across the boundary where they meet. Once that section is blended, move to the next area. This approach is sometimes called band blending, and it breaks the task into manageable steps.
Pros: No extra materials needed. Gives you full control over each transition. Works with any heavy body acrylic brand.
Cons: The process can take longer overall. Matching colors between sections requires careful attention. You may see slight inconsistencies if sections dry at different rates.
Use the Wet on Wet Blending Technique
Wet on wet blending means applying one color of paint directly into another color that is still wet on the canvas. This technique works best when you act quickly and confidently. Load your brush with a generous amount of paint and place both colors on the canvas at the same time.
Then, using a clean, dry brush (often called a mop brush or blending brush), lightly sweep across the boundary of the two colors. Barely touch the surface and let the bristle tips do the work. The less pressure you apply, the smoother the blend will look.
Pros: Produces beautiful, seamless gradients. It is the most natural blending method for acrylics and requires only brushes.
Cons: You must work fast. Heavy body acrylics can start forming a skin within minutes. This technique benefits greatly from being combined with a retarder or misting.
Apply the Glazing Technique for Smooth Transitions
Glazing is a different approach to blending. Instead of mixing colors while they are wet, you layer thin, transparent washes of paint over dried layers. Each glaze subtly shifts the color underneath, creating a smooth transition that builds up over multiple layers.
To glaze, thin your heavy body acrylic with a glazing medium until it becomes semi transparent. Apply it in a thin, even coat over a dry area. Let it dry completely before applying the next layer. Repeat until you achieve the color depth and transition you want.
Pros: Eliminates the time pressure entirely since each layer is applied over dry paint. Produces luminous, rich color transitions. Excellent for portraits and realistic subjects.
Cons: The process is slow. Each layer must dry before the next one goes on. It requires patience and a good understanding of color theory to predict how layers will interact.
Use Thicker Paint Loads on Your Brush
Thin layers of heavy body acrylic dry much faster than thick ones. When you load your brush with a generous amount of paint, the thicker layer retains moisture longer and gives you more time to blend before the surface sets up.
This technique works especially well for impasto style blending. Instead of thinning your paint, keep it at full body thickness and work it directly on the canvas. The extra volume of paint acts as its own moisture reservoir, slowing the surface drying rate.
Pros: No additives needed. Takes advantage of the natural properties of heavy body paint. Creates rich, textured blends.
Cons: Uses more paint per session, which can increase costs. Very thick layers may take longer to fully cure underneath, even if the surface feels dry.
Control Your Painting Environment
The room where you paint has a direct effect on how fast your acrylics dry. Warm, dry air accelerates evaporation. Painting near a heater, in direct sunlight, or in an air conditioned room with low humidity will shorten your blending window dramatically.
Aim to paint in a space with temperatures between 65°F and 75°F and relative humidity around 40% to 60%. You can increase humidity by placing a bowl of water near your workspace or using a small room humidifier. Also, avoid painting near open windows or fans that create airflow across your canvas.
Pros: Costs little or nothing to adjust. Provides a consistent improvement to working time across your entire session.
Cons: Not always possible to control, especially in shared spaces or during extreme weather. Raising humidity too high can slow drying to the point where layers take a very long time to set.
Choose the Right Brush for Blending
Your brush choice plays a bigger role in blending quality than most beginners realize. Soft, synthetic filament brushes work well for smooth gradients because they glide across the surface without disturbing the paint too much. A large, soft mop brush is especially useful for feathering edges.
For wet on wet blending, keep a separate clean brush dedicated to blending only. Do not use the same brush you loaded paint with. A clean, dry or slightly damp brush picks up less paint and creates smoother transitions between colors.
Pros: Good brushes improve your blending results immediately. A mop brush or fan brush can make the process feel almost effortless.
Cons: High quality soft brushes can be an investment. They also require proper cleaning and care to maintain their softness and shape over time.
Dampen the Back of Your Canvas
This is a lesser known trick that works surprisingly well. Wetting the back of your stretched canvas with a damp cloth or spray bottle adds moisture that slowly migrates through the fabric to the front surface. This keeps the working side slightly cooler and more humid.
Simply flip your canvas before you begin and apply a light, even layer of water to the back. Then flip it back to the front and start painting. The moisture slows the evaporation rate of the paint on the front, adding extra working time without putting water directly into your paint.
Pros: Does not alter paint consistency at all. Adds a subtle but helpful extension to working time. Works well alongside other techniques.
Cons: Only effective for stretched canvas, not canvas boards or panels. The effect is modest and works best in combination with other methods listed above.
Combine Multiple Methods for the Best Results
No single technique solves the drying problem completely on its own. The most effective approach is to stack several methods together. For example, you might add a small amount of retarder to your paint, mist the canvas lightly, use a wet palette, and work in small sections.
Start by choosing one or two methods that fit your budget and style. Then add more as you get comfortable. Many professional acrylic painters use a combination of retarder medium, a wet palette, and environmental controls as their standard setup. This layered approach gives you a reliable, extended blending window every time you paint.
Think of each method as adding a few extra minutes to your open time. Individually, the gains may seem small. Together, they can transform your blending experience and remove the stress of racing against the clock.
Frequently Asked Questions
How much retarder should I add to heavy body acrylics?
The general recommendation is 10% to 15% retarder by volume of paint. Start with a small amount and test the drying behavior on a scrap surface. Adding more than 15% can cause the paint to become gummy, sticky, and difficult to cure. Each brand has slightly different guidelines, so check the label on your specific retarder product.
Can I use water instead of retarder to slow drying?
Water does thin the paint and briefly extend working time, but it evaporates quickly. Paradoxically, adding too much water can actually make your paint dry faster once it is on the canvas because it thins the film. Water also weakens the binder and can reduce paint adhesion. A retarder or slow drying medium is a more reliable choice.
Do open acrylics work the same as heavy body acrylics?
Open acrylics have a similar pigment load but are formulated to dry up to 10 times slower than standard heavy body paints. They feel slightly different on the brush and take longer to build up layers. You can mix open acrylics with heavy body paints to create a custom blend that offers extended working time while keeping a thicker consistency.
Will misting the canvas ruin my painting?
Not if you use a fine mist from a proper spray bottle held about 12 inches away. A light mist adds a thin moisture layer that slows surface drying. Avoid spraying too much at once, as large water droplets can dilute paint, cause drips, or weaken the bond between paint layers.
What room temperature is best for blending acrylics?
A temperature range of 65°F to 75°F with relative humidity between 40% and 60% provides the best conditions. Hot, dry environments cause acrylics to dry very quickly. If you cannot control the room temperature, focus on the methods you can control, such as retarder, misting, and using a wet palette.
Is glazing better than wet blending for smooth transitions?
Each method has its own strengths. Wet blending creates immediate, soft gradients and works best for fast, expressive painting. Glazing builds color transitions slowly through transparent layers and produces a luminous, depth rich effect. Many artists use both methods in the same painting depending on the area they are working on.

Hi, I’m Zoe Ward, the creator and voice behind Fine Brush Vault. I’m passionate about art, painting, and exploring the world of colors. I spend my time testing and reviewing art supplies to help fellow creators find the best tools for their craft. Through honest reviews and detailed guides, my goal is to make your creative journey easier and more inspiring.