
Why Is My Oil Paint Cracking As It Dries On The Canvas?
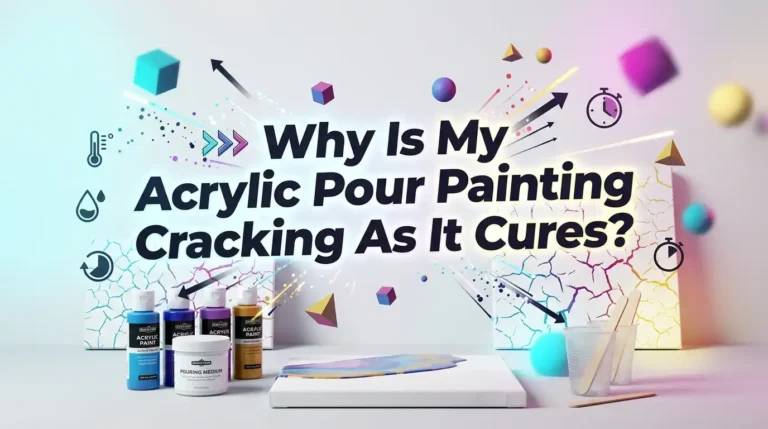
Few things sting more than watching a painting you loved start to split apart. You step back, you look closer, and tiny lines spread across the surface like a dry riverbed. Your stomach drops.
What went wrong? The good news is simple. Oil paint cracking is almost always caused by something you can understand and fix. It is rarely random, and it is rarely your fault as an artist who simply did not know the rules yet.
In this post, you will learn exactly why oil paint cracks as it dries, what each type of crack means, and how to stop it from happening again.
Key Takeaways
- Cracking is mostly a drying mismatch. It happens when your top paint layer dries faster or shrinks more than the layer beneath it. The lower layer keeps moving while the surface has already hardened.
- The “fat over lean” rule is your best shield. Each new layer should hold more oil than the one before it. This keeps upper layers flexible and lower layers firm, so they dry in the right order.
- Solvents like turpentine weaken the paint film. Too much thinner strips away the oil that binds pigment together. This leaves a brittle, powdery surface that splits easily.
- Heat, cold, and humidity swings cause stress. Drying a painting too fast near a heater or in a damp room pulls the layers apart. Slow and steady drying is always safer.
- Your canvas and primer matter just as much as your paint. A poorly stretched canvas or a bad ground layer can crack even a perfect painting on top of it.
- Most cracking is preventable, and some is fixable. Small fresh cracks can often be reworked, while structural problems need a more careful repair.
What Cracking Actually Means When Oil Paint Dries
Oil paint does not dry the way water based paint dries. It does not lose water through evaporation. Instead, the oil reacts with air in a slow process called oxidation.
The oil absorbs oxygen, grows thicker, and slowly hardens into a solid film. This can take days on the surface and months or even years deep inside the layer.
Cracking shows up when the parts of your painting harden at different speeds. The surface might feel dry to the touch while the layer below is still soft and moving.
As the lower layer keeps shifting, the stiff surface above it cannot stretch to match. So it splits. Understanding this single idea, uneven drying creates stress, explains nearly every cracking problem you will ever face.
The Fat Over Lean Rule And Why Breaking It Causes Cracks
The phrase “fat over lean” is the single most important rule in oil painting. “Fat” means paint with more oil in it. “Lean” means paint with less oil, often thinned with solvent. The rule says each layer you add should be fatter than the one below it. This is not a style choice. It is physics.
Lean paint dries faster and becomes firm quickly. Fat paint dries slower and stays flexible longer. When you build fat over lean, your lower layers set first and hold still while the flexible top layer dries safely on top.
Break this rule and you invite trouble. If you put lean paint over fat paint, the surface hardens while the oily layer below keeps moving. The stiff top cracks apart as the soft bottom shifts.
Pros of following fat over lean: it gives you a stable film, predictable drying, and long term durability. Cons: it requires planning your layers in advance, and it slows down spontaneous painting since you must think about oil content at each stage.
Using Too Much Solvent And Thinner
Many beginners reach for turpentine or mineral spirits to make paint flow better. This feels helpful in the moment.
But solvent does not add anything to the paint. It only removes oil. When you thin paint heavily with solvent, you strip out the very thing that binds the pigment particles together.
The result is a weak, chalky, underbound film. It has too little oil to form a strong, flexible layer. As it dries, it shrinks and cracks because there is not enough binder holding everything in place. This is especially common in upper layers where artists add solvent to keep things workable.
To fix this, use solvent only in your first thin layers, and use it sparingly. As you build up, switch to oil based mediums instead. Pros of less solvent: a stronger, glossier, more durable film. Cons: paint moves more slowly and dries more slowly, which can test your patience on busy painting days.
Painting Layers Too Thick Too Fast
Thick paint looks rich and bold. Impasto work can be stunning. But thick layers hide a hidden risk. When you pile paint on heavily, the surface skins over and hardens while the inside stays soft and wet for a long time. This sets up the classic cracking trap.
The hardened skin cannot move, but the soft interior keeps oxidizing and shifting underneath. Over weeks, the surface splits into what artists call alligator cracks, wide cracks that look like reptile skin. Thick titanium white is a frequent culprit because it dries unevenly and becomes brittle.
The fix is to build thickness gradually across several drying sessions instead of all at once. Let each layer set before adding more. Pros of thin building: even drying and far less cracking. Cons: it takes much longer to reach a thick, textured look, so impasto effects need real patience and planning.
How Temperature Affects Your Drying Paint
Temperature plays a quiet but powerful role in cracking. Many artists place a wet painting near a radiator, heater, or sunny window to speed up drying. This is one of the fastest ways to crack a fresh painting. Heat hardens the surface quickly while the layer beneath stays soft.
You end up with a hard outer shell over a moving inner layer, which is the exact recipe for cracks. Cold has the opposite problem. In a chilly room, paint dries so slowly that lower layers may stay soft far longer than expected, throwing off your fat over lean timing.
Aim for a stable room temperature, around 65 to 75 degrees Fahrenheit, and avoid direct heat sources. Pros of stable temperature: predictable, even drying throughout the film. Cons: you cannot rush the process, so drying takes its natural time, which can feel slow on a deadline.
The Role Of Humidity And Moisture In Canvas Cracking
Humidity affects the canvas more than the paint itself. Canvas fabric and traditional glue sizing absorb moisture and swell when the air is damp. When the air dries out, they shrink. Oil paint responds much more slowly to these changes than the fabric beneath it.
This mismatch creates pulling and pushing forces inside the painting. Over many cycles of damp and dry air, the stress builds at the edges and corners first, which is exactly where cracks often appear. Damp basements, cool exterior walls, and rapid weather swings make this worse.
Keep your studio and storage at a steady humidity, ideally between 40 and 60 percent. Slow, gentle changes are safe. Sharp daily swings are the danger. Pros of humidity control: a stable canvas that supports your paint film well. Cons: it may require a humidifier or dehumidifier, which adds cost and a little maintenance to your studio setup.
Choosing The Right Pigments To Avoid Cracking
Not all colors behave the same way as they dry. Some pigments react with oil and dry quickly and evenly. Others do not. Pigments containing iron, cobalt, or lead are reactive. They speed up drying and form strong, cohesive films. These are your reliable, stable colors.
Other pigments are less cooperative. Titanium white, zinc white, and some cadmium and organic colors dry unevenly or become brittle over time. Zinc white in particular tends to form tiny cracks and can weaken the layers it sits in. Cadmium red can crack when applied thickly.
You do not need to avoid these colors entirely. Just use them with care, keep them in thin layers, and mix slow drying colors with faster drying ones to balance the film.
Pros of smart pigment choices: a more durable painting. Cons: it limits some pure color use, and you must learn the drying habits of each tube you own.
Why Your Canvas Preparation Matters
Sometimes the paint is not the problem at all. The surface underneath it is. A canvas that is stretched too tightly, or one with a poor primer, can crack no matter how well you paint on top. The ground layer is the foundation, and a weak foundation fails first.
If you apply gesso too thickly, or use a low quality primer, the ground itself can crack and take your painting down with it. A thick, brittle ground layer is especially risky on a flexible canvas that moves with humidity. Cheap pre primed canvas is a common hidden cause of cracking.
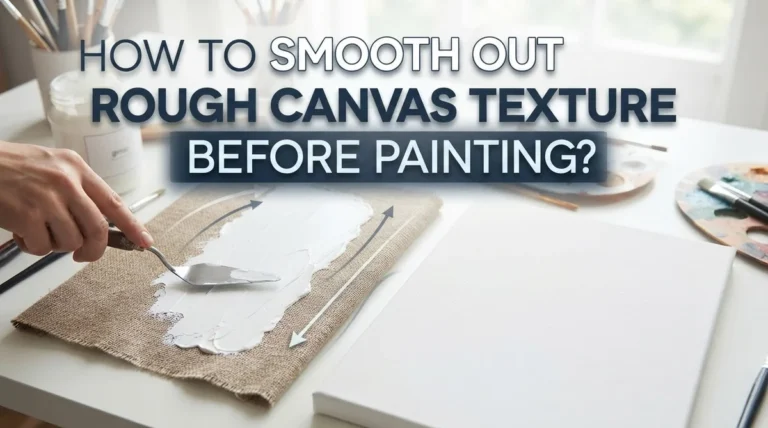
Prepare your surface well. Apply thin, even coats of a quality acrylic gesso or oil ground, and let each coat dry fully. Pros of good preparation: a stable base that supports everything above it. Cons: it adds time before you even start painting, and quality grounds cost more than bargain options.
Mixing Incompatible Mediums And Materials
Oil painting offers many mediums: linseed oil, walnut oil, stand oil, alkyd mediums, and more. Each changes how your paint flows and dries. Problems start when you mix products that do not work together or switch mediums randomly between layers.
Different mediums dry at different speeds and with different flexibility. If a fast drying alkyd layer sits over a slow drying oil layer, the timing mismatch can cause cracks. Combining incompatible materials creates chemical and physical stress inside the film that pulls it apart.
The safest approach is to pick one medium system and stick with it through a painting. Read the labels and follow fat over lean even with your mediums.
Pros of a consistent system: reliable, predictable drying. Cons: you give up the freedom to grab whatever is on the table, and you may need to test combinations before trusting them on finished work.
How To Identify The Type Of Crack You Have
Not all cracks look or behave the same, and the type tells you the cause. Learning to read your cracks helps you fix the right problem. Take a close look, ideally under raking light from the side, which makes texture easier to see.
Fine hairline cracks in a web like pattern often point to a brittle or underbound film, usually from too much solvent. Wide alligator cracks that resemble reptile skin usually mean the surface dried over a still soft layer, common with thick paint or heat drying. Cracks at the edges and corners often trace back to canvas movement from humidity.
Match the pattern to the cause, then apply the matching solution from this post. Pros of diagnosing first: you fix the real issue instead of guessing. Cons: it takes a careful eye and some experience to read cracks correctly, so early on you may need to compare against examples.
Step By Step Solutions To Prevent Cracking
Now let us pull everything into a clear action plan. Follow these steps and you will avoid the vast majority of cracking problems. Start with your surface, then build your layers, then control your environment.
First, prepare a well stretched canvas with thin, even coats of quality primer, and let it dry fully. Second, build your painting fat over lean, adding more oil to each new layer.
Third, use solvent only in early thin layers and switch to oil mediums as you build up. Fourth, keep layers reasonably thin and let each one set before adding the next.
Fifth, dry your work in a stable room away from heaters and direct sun. Sixth, keep humidity steady. Pros of this full system: durable paintings that last for generations. Cons: it demands patience and planning, which can feel limiting when you want to paint freely and fast.
How To Repair Cracks In A Drying Oil Painting
If cracks have already appeared, do not panic. Some cracks can be fixed, especially if the paint is still relatively fresh. The approach depends on how deep and severe the damage is.
For small surface cracks in still soft paint, you can sometimes gently rework the area with a little extra oil rich paint, blending it back together.
Add oil, not solvent, so you do not repeat the original mistake. For a fully dried, lightly cracked surface, careful repainting over the area can hide fine lines once the lower layers are stable.
For deep, structural cracks or flaking paint, the safest path is a professional conservator. They have tools and methods that protect the original work. Pros of self repair: it is free and quick for minor issues. Cons: poor repairs can make things worse, and serious damage truly needs an expert hand.
Frequently Asked Questions
Can I fix oil paint that has already cracked while drying?
Yes, in many cases. Fresh, shallow cracks in soft paint can often be reworked with oil rich paint applied gently over the area. Deep cracks, flaking, or cracks in fully cured paint are harder. For serious or valuable work, a professional conservator gives the safest result.
Does cheap oil paint crack more than expensive paint?
It often does. Lower quality paints contain less pigment and more filler and oil extenders, which dry less predictably. Different colors in cheap sets also dry at very different speeds. This uneven drying raises the cracking risk. Quality paints with stable pigments give you more reliable, even drying.
How long should I wait between oil paint layers?
Wait until the lower layer feels firm and touch dry, which can take a few days to over a week depending on the color and thickness. Always confirm the layer beneath is set before adding more. Rushing layers is one of the most common causes of cracking.
Will adding more linseed oil stop my paint from cracking?
Used correctly, oil helps because it keeps upper layers flexible and supports the fat over lean rule. But too much oil can cause its own problems, like wrinkling and slow drying. The goal is balance: add a little more oil with each layer, not a flood of it all at once.
Is some cracking in old oil paintings normal?
Yes. Most old oil paintings develop fine cracks over decades as the oil continues to age and the canvas moves with the seasons. This natural aging is called craquelure, and it is usually stable. The cracking you want to prevent is the early, severe kind that comes from technique or environment.
Does the type of canvas affect cracking?
Definitely. A loose, poorly stretched, or low quality canvas moves more with humidity, which stresses the paint above it. A firm, well stretched, well primed surface gives your paint a stable foundation. Rigid panels crack even less than canvas because they barely move at all.

Hi, I’m Zoe Ward, the creator and voice behind Fine Brush Vault. I’m passionate about art, painting, and exploring the world of colors. I spend my time testing and reviewing art supplies to help fellow creators find the best tools for their craft. Through honest reviews and detailed guides, my goal is to make your creative journey easier and more inspiring.