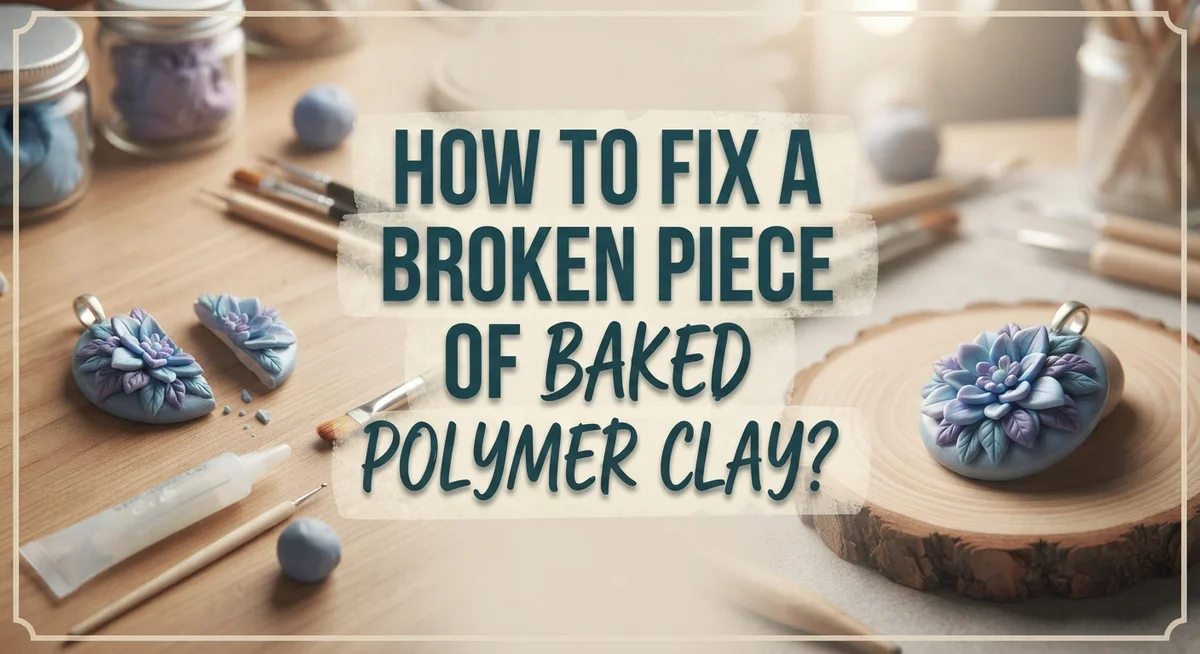
How To Fix A Broken Piece Of Baked Polymer Clay?
Did your favorite polymer clay piece just snap in half? Don’t panic. This happens to almost every clay artist at some point.
The good news is that broken baked polymer clay can be fixed. You don’t need to toss out your project and start over.
With a few simple steps, you can repair cracks and chunks like a pro. The trick is using the right amount of matching clay and rebaking it correctly.
In this guide, we will walk you through the entire repair process. You will learn how to fix small hairline cracks with a thin clay snake technique.
In a Nutshell
- Match the clay color first. This step matters most for a seamless repair. Grab a small piece of matching clay before you start.
- For thin cracks, roll a tiny snake shaped piece of clay. Press it gently over the crack line.
- For bigger chunks, use a small ball of clay to fill the gap. Press it into the damaged area with care.
- Use minimal clay every time you repair. Too much clay creates ugly bumps and bulges.
- Try a glue and clay dust mix as another option. This filler works great for tiny cracks too.
- Always rebake your piece after the repair. Skipping this step means your fix will not hold.
Why Baked Polymer Clay Cracks Or Breaks
Baked polymer clay breaks for several reasons, and understanding these causes helps you prevent future damage.
Temperature fluctuations are a main culprit. When you bake polymer clay, it hardens through heat. If the oven temperature isn’t accurate or consistent, the clay doesn’t cure properly. Uneven baking creates weak spots that crack easily.
Thin sections of your piece are naturally fragile. Areas like fingers, handles, or decorative details have less material to support stress. These thin parts snap when you apply pressure or drop the item.
Improper mixing before baking causes internal weakness. If you don’t knead the clay thoroughly, air pockets remain trapped inside. These pockets become stress points where breaks start.
Drying out happens when clay sits too long before baking. Polymer clay loses moisture over time, becoming brittle. Brittle clay fractures more easily than fresh clay.
Rapid cooling after baking can cause cracks. When hot clay cools too quickly, the outer surface shrinks faster than the inside. This creates tension that leads to hairline cracks.
Physical stress breaks pieces during normal use. Dropping your creation, bending it, or applying sudden force causes breaks. Even well made pieces can’t survive rough handling.
Incompatible clay brands sometimes don’t bond well together. Mixing different brands creates weak seams where breaks happen.
Understanding these causes helps you make better pieces going forward. Consistent oven temperature, proper kneading, and careful handling reduce breakage significantly. Even with perfect technique, accidents happen. The good news is that most breaks are fixable with simple repair methods.
Tools And Materials You’ll Need For Repairs
Before you start fixing your broken polymer clay piece, gather the right supplies. Having everything ready makes the repair process smooth and quick.
Polymer clay in matching colors is your most important material. You need clay that matches your original piece as closely as possible. Check your leftover clay scraps or mix colors to get the right shade. Having the exact color prevents visible repair lines on your finished piece.
A small work surface helps you prepare clay pieces before applying them. Use a ceramic tile, glass plate, or smooth countertop. This gives you space to roll and shape tiny clay pieces without mess.
Tools for shaping clay include your fingers, a toothpick, or a small sculpting tool. Toothpicks work great for pressing clay into tight cracks. Your fingers are perfect for rolling snake shapes and small balls.
Glue and clay dust serve as an alternative filler option. Mix polymer clay dust with strong adhesive to create a paste. This works well for hairline cracks where you want minimal bulk.
A baking surface is essential for rebaking your repaired piece. Use the same surface you used for original baking, like a ceramic tile or baking sheet. Make sure it can handle your oven’s temperature.
An oven thermometer ensures accurate baking temperature. Polymer clay needs specific heat levels to cure properly. Wrong temperatures can damage your repair or your original piece.
Sandpaper or files smooth rough edges after rebaking. Fine grit sandpaper works best for delicate pieces. This final step gives your repair a professional appearance.
How To Fix Hairline Cracks In Baked Polymer Clay
Hairline cracks are thin lines that appear on your baked polymer clay piece. These small fractures need quick attention before they grow larger and damage your creation.
Start by cleaning the cracked area. Use a soft brush or cloth to remove dust and debris from the hairline crack. A clean surface helps your repair material stick better and creates a stronger bond.
Roll a tiny snake of matching polymer clay. Make it as thin as possible, almost thread-like in appearance. This thin shape fits perfectly into the hairline crack without adding bulk to your piece. Press it gently into the crack using your finger or a small tool.
Work the clay into the entire crack length. Push the clay snake along the full line of the crack. Make sure it fills the gap completely from start to finish. Smooth the surface with your finger so the repair blends with the surrounding area.
Consider using clay dust mixed with glue as an alternative. This option creates a lighter repair that feels more like the original piece. Mix the dust and glue until you get a paste-like consistency. Apply it into the hairline crack using a small brush or applicator.
Rebake your piece at the correct temperature. Follow the original baking instructions for your specific clay type. Rebaking permanently sets your repair and bonds the new clay to the old surface.
Let your piece cool completely before handling. Avoid touching or moving it while it cools. Gentle cooling prevents new cracks from forming around your repair.
Hairline cracks become invisible once properly repaired. Your piece will look whole and undamaged again.
How To Repair Broken Chunks Or Missing Pieces
When your polymer clay piece breaks into chunks or loses pieces entirely, you can restore it successfully. The key is filling the damaged area with fresh clay that matches your original piece.
Start by examining the broken section closely. Remove any loose fragments or debris from the damaged area. Clean the space with a soft cloth to ensure good contact between the repair clay and the existing piece.
Roll a small ball of matching polymer clay. The size depends on how large the missing or broken section is. Keep the amount minimal to avoid creating a bulky, obvious repair that looks different from the rest of your work.
Press the clay ball firmly into the damaged area. Work it into all the crevices and spaces where the break occurred. Smooth the repair clay so it blends with the surrounding surface as much as possible. Your fingers work well for this step, or use a small sculpting tool for more precision.
If you have leftover clay dust from your original piece, mix it with glue instead. This creates a lighter filler that feels more authentic to your work. Apply it the same way you would fresh clay.
Once the repair feels secure and properly shaped, prepare your piece for rebaking. Place it on a baking surface and follow the original temperature instructions for your specific clay type. Rebaking bonds the new clay to the existing piece and hardens the repair.
After baking cools completely, sand any rough edges with fine sandpaper. This creates a seamless transition between the repair and the original surface.
Matching Clay Color For A Seamless Repair
Getting the color right is absolutely critical for a repair that disappears into your original piece. If your colors don’t match, the fix becomes obvious and stands out like a sore thumb.
Start by examining your original piece in good lighting. Look at the exact shade, whether it has any texture, and if there are multiple colors blended together. Take your time with this step because accurate color matching makes all the difference.
If you have leftover clay from your original project, that’s your best option. Use the exact same clay brand and type you used initially. This ensures the color stays consistent after rebaking since polymer clay can shift slightly during heat exposure.
When matching is tricky, test your color on a hidden area first. Press a small piece of your chosen clay onto the back or underside of your piece. Bake it alongside your repair to see how the color develops in the oven. This prevents surprises when your main repair is already in place.
Blend colors together if needed to get closer to your original shade. Mix two different clay colors on your work surface until you achieve the right tone. This technique helps when you don’t have the exact original clay available.
Keep your color sample nearby while working on the actual repair. Natural light changes throughout the day, so check your match under the same lighting conditions you used for your initial test.
If your piece has a glossy or matte finish, remember that rebaking might alter the surface slightly. Your color match in the clay itself is what matters most for a seamless repair that looks intentional rather than damaged.
Rebaking Repaired Polymer Clay Pieces Correctly
Rebaking is the final step that makes your repair permanent and strong. Your piece needs heat to fuse the new clay to the old surface. This process bonds everything together so the repair lasts.
Before you rebake, check that your repair clay matches the original piece. The color should blend seamlessly. If it looks off, adjust it now while the clay is still soft. Press the repair material firmly into place so no air pockets remain underneath.
Find the correct baking temperature for your specific clay type. This information came with your original clay or appears on the package. Use an oven thermometer to verify accuracy. Many people skip this step and end up with repairs that don’t hold.
Place your piece on a baking surface that won’t stick. Parchment paper or a ceramic tile works well. Keep the piece away from other items in the oven. This prevents accidental contact during baking.
Bake for the time recommended by your clay manufacturer. Don’t rush this process or cut the time short. Underbaking means the repair won’t set properly. Overbaking can darken your piece or make it brittle.
Let your piece cool completely before touching it. Hot polymer clay is fragile and breaks easily. Cooling takes about 30 minutes depending on size. Patience here prevents ruining your repair work.
After cooling, examine the repaired area closely. The repair should feel solid and secure. If rough edges appear, sand them gently with fine sandpaper. Your piece is now ready to use or display. The repair becomes a permanent part of your creation.
Common Mistakes To Avoid When Repairing Baked Clay
When repairing broken baked polymer clay, certain mistakes will weaken your results or ruin the entire piece. Understanding what to avoid saves you time and frustration.
Overstuffing the repair area is the most common error. Many people pile too much fresh clay into cracks or breaks. This creates visible bulk that sticks out from your original piece. The repair becomes obvious instead of invisible. Use only the minimum amount of clay needed to fill the damaged spot.
Skipping the color matching step ruins seamless repairs. You cannot simply grab any clay and expect it to blend in. Your repair will look like a patch rather than part of the original work. Take time to test colors on a hidden area first. Blend shades carefully if needed.
Forgetting to rebake after repairs is another critical mistake. Some people assume the repair will hold without heat treatment. Fresh clay needs baking to become strong and permanent. Your repair will remain soft and vulnerable to damage without proper baking.
Using clay that is too old or dry causes problems during application. Old clay becomes stiff and difficult to press into cracks. It may not bond properly to your baked piece. Always use fresh, workable clay for best results.
Applying repairs to a dusty or dirty surface prevents proper adhesion. Clean your broken area gently before adding new clay. Remove any loose particles or debris.
Rushing the cooling process can crack your repair. Let your piece cool completely before touching or handling it. Sudden temperature changes stress the clay and create new breaks.
These mistakes are easy to avoid once you recognize them. Slow down, work carefully, and follow each step properly for strong, lasting repairs.
Troubleshooting Difficult Or Recurring Repair Issues
When your repaired polymer clay piece experiences problems, you need to identify what went wrong. Recurring breaks in the same spot usually mean your repair wasn’t strong enough or the clay wasn’t fully bonded to the original piece.
If cracks keep appearing after rebaking, your repair clay may not have been pressed firmly enough into the damaged area. The clay needs direct contact with the broken surfaces. Press your filler clay down hard and smooth it into every crevice. Small air pockets create weak spots where breaks happen again.
Sometimes repairs fail because you used old or dried out clay. Fresh clay bonds much better than clay that’s been sitting around for months. Check your clay’s consistency before using it. It should be soft and pliable, not crumbly or stiff.
Surface preparation matters more than most people realize. If dust or debris sits on your break, the repair clay won’t stick properly. Clean the damaged area gently with a soft brush before applying filler clay. This removes loose particles that prevent bonding.
If your piece keeps breaking in different spots, the original baking temperature might have been incorrect. When clay isn’t baked properly, it becomes brittle and fragile. Check your clay manufacturer’s instructions for the exact temperature and time. Underbaking leaves clay weak and prone to shattering.
For stubborn repairs, consider using polymer clay dust mixed with a flexible adhesive instead of solid clay. This creates a stronger bond that flexes slightly when the piece moves or experiences pressure. This method works especially well for pieces that get handled frequently or stored in temperature changing environments.
Final Thoughts
Fixing broken baked polymer clay is a simple skill anyone can learn. With a little patience, you can bring damaged pieces back to life.
The key steps are easy to remember. Match your clay color carefully. Use only small amounts of clay for each repair. Then rebake your piece properly.
Small cracks need less clay than broken chunks. A thin snake shape works well for cracks. A small ball of clay fills larger gaps.
Avoid piling on too much clay. This creates lumps that stand out. Less clay always gives you a smoother result.
Color matching makes your repair invisible. Take time to test your clay blend before applying it. This small step makes a big difference in the final look.
Rebaking is not optional. It bonds the new clay to the old piece. Skipping this step means your repair will not last.
Cracks and breaks happen to even the most careful crafters. This does not mean your project is ruined. Most damage can be fixed with basic tools and clay you already have.
Practice makes these repairs easier over time. Your first fix might not be perfect. Each attempt teaches you something new about handling clay.
Keep extra clay on hand for future repairs. This saves you from scrambling later. It also helps you match colors more easily.
Polymer clay repair is a useful skill for any crafter. It saves your projects from going to waste. It also builds your confidence with this fun material.
With the right approach, broken pieces become learning opportunities. Your finished piece can look as good as new. Keep these tips handy for your next repair job.
Frequently Asked Questions
Can I repair hairline cracks without rebaking?
Hairline cracks need rebaking to hold properly. You can fill the crack with a thin snake of matching polymer clay, but the repair won’t be permanent without heat. The new clay must bond with the original piece through the baking process. Skip this step and your repair will eventually fall apart.
What’s the best way to match clay color for repairs?
Color matching is essential for invisible repairs. Knead a small piece of polymer clay until it matches your original piece exactly. Test the color on a hidden area first. If your original piece is a solid color, this step is straightforward. For multicolored pieces, blend colors together until you get the right shade.
Should I use clay dust or solid clay for repairs?
Both methods work, but they serve different purposes. Solid clay works best for visible breaks and chunks. Clay dust mixed with flexible adhesive works well for hairline cracks and small damage. Dust creates a smoother finish with less visible bulk. Choose solid clay when you need to fill a gap and dust when you want a seamless blend.
How do I know if my repair will hold after rebaking?
Press your repair clay firmly into the damaged area before rebaking. The better the contact between new and old clay, the stronger your bond. After rebaking and cooling, gently test the repair by flexing the piece slightly. If it holds without cracking, your repair succeeded. Repairs that fail usually show cracks immediately after cooling.

Hi, I’m Zoe Ward, the creator and voice behind Fine Brush Vault. I’m passionate about art, painting, and exploring the world of colors. I spend my time testing and reviewing art supplies to help fellow creators find the best tools for their craft. Through honest reviews and detailed guides, my goal is to make your creative journey easier and more inspiring.