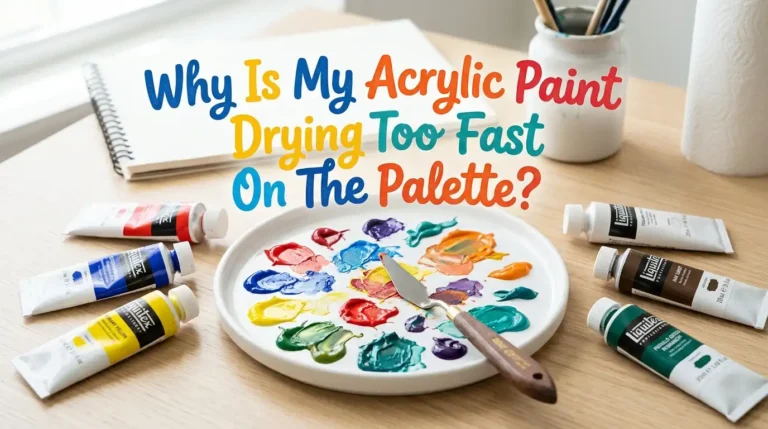

How To Fix Dried Out Acrylic Paint In The Tube?
You reach for your favorite tube of acrylic paint, and it feels rock hard. The cap won’t budge, and the paint inside seems gone for good. That moment hurts, especially when good paint costs real money.
But here is the good news. You do not always have to throw that tube away. Many tubes are only partly dried, and you can bring them back to life with a few simple tricks.
This guide walks you through every fix step by step, from quick water tricks to deeper rescue methods. You will also learn how to tell when paint is truly dead, and how to stop this from happening again. Let’s save your paint and your wallet.
In a Nutshell:
- Check the damage first. Paint that is soft or pasty can be saved easily. Fully cured, rubbery paint usually cannot come back because the chemicals have changed for good.
- Water works for mild cases. Add small drops of warm or distilled water and knead the tube gently. This is the safest and cheapest first step.
- Isopropyl alcohol helps stubborn paint. A few drops of rubbing alcohol can loosen thicker, half dried paint when plain water fails to do the job.
- Heat softens the paint and the cap. Warm water soaking opens stuck caps and makes the paint inside more flexible for mixing.
- Transfer to a jar if the tube is broken. Sometimes the best move is to cut the tube open and rescue the usable paint inside a small airtight container.
- Prevention beats repair every time. Clean caps, tight lids, and proper storage keep your tubes soft for years. A little care now saves a lot of effort later.
Why Acrylic Paint Dries Out In The Tube
Acrylic paint is water based, but it does not stay wet forever. The paint holds tiny plastic particles in a liquid. When air sneaks in, the water evaporates.
Once the water leaves, the plastic particles start to bond together. This process is called curing, and it is the real enemy here.
The most common cause is a loose or cracked cap. Air gets in through the tiniest gap. Old tubes, hot storage spots, and dried paint stuck in the cap threads also speed up the problem.
Even a tube that looks sealed can lose moisture over months. Understanding this helps you pick the right fix and stops you from wasting effort on paint that is truly gone.
How To Tell If Your Paint Can Still Be Saved
Not every dried tube is a lost cause, so check the paint before you act. Squeeze the tube gently and feel what happens inside. Soft, thick, or pasty paint is great news. You can almost always revive that.
Open the cap and look at the texture. If the paint is gummy but still moves, it is only partly dried. You can fix this with water or alcohol. But if the paint feels like hard rubber, a solid puck, or a stiff block that will not bend, the bad news arrives.
That paint has fully cured and turned waterproof. No amount of water will dissolve it. Knowing the difference saves you from frustration and points you to the method that will actually work.
Method 1: Reviving Paint With Water
Water is your first and gentlest tool, and it works well on mildly thick paint. Start by squeezing a small amount of the paint onto a palette or into a small dish. Add water one drop at a time. Too much water at once will ruin the paint and weaken its color.
Mix the paint and water with a palette knife or an old brush. Keep stirring until the paint becomes smooth and creamy again. Warm or distilled water works best because it blends faster and avoids hard minerals. Repeat the drops until you reach a paint consistency you like.
Pros: This method is free, safe, and easy for beginners. It keeps the paint nontoxic.
Cons: Water only fixes soft or pasty paint. It does nothing for fully cured paint, and too much water thins the color too far.
Method 2: Using Isopropyl Alcohol For Stubborn Paint
When water fails on thicker, half dried paint, isopropyl alcohol steps in. Rubbing alcohol breaks down the paint binder a little, which loosens the texture. This makes it stronger than water for tough cases. Many model painters swear by this trick.
Squeeze the paint into a dish, then add a few drops of alcohol. Stir hard and let it sit for a minute or two. The alcohol works its way into the paint and softens it. Add more drops slowly until the paint flows again. Always work in a room with good airflow.
Pros: Alcohol revives paint that water cannot touch. It acts fast and uses very little product.
Cons: The fumes can be strong, so ventilation matters. Too much alcohol may change how the paint dries and sticks to your surface.
Method 3: The Warm Water Soak For Stuck Caps And Hard Tubes
Sometimes the paint is fine, but the cap is glued shut with dried paint. A warm water soak fixes both problems at once. Fill a cup or bowl with warm, not boiling, water. Place the tube cap side down into the water. Let it soak for ten to fifteen minutes.
The warmth softens the dried paint around the threads. It also makes the paint inside more flexible and easier to squeeze. After soaking, grip the cap with a cloth for better hold and twist it open. Wipe away any crusty paint from the threads before you reseal.
Pros: This method opens stuck caps without breaking the tube. It gently warms the paint without harsh chemicals.
Cons: It only helps with surface drying and stuck caps. Very hot water can damage some tube materials, so keep the heat mild.
Method 4: Kneading And Massaging The Tube
Before you cut anything open, try working the tube with your hands. Kneading helps break up small hard spots inside the paint. Hold the tube and squeeze it from end to end, just like a tube of toothpaste. This pushes the soft paint into the harder areas.
Massage the tube for a few minutes and feel it loosen. Combine this with a warm water soak for better results. The heat plus the pressure works the paint back into a usable state. Once the tube feels softer, squeeze a little out to test it.
Pros: This costs nothing and adds no water or chemicals. It keeps the paint at full strength and color.
Cons: It only works on partly soft paint. Fully cured chunks will not break apart no matter how hard you press.
Method 5: Cutting The Tube Open To Rescue Usable Paint
When the cap will not open or the paint is stuck deep inside, cut the tube open. This sounds drastic, but it often saves paint you thought was lost. Use scissors or a craft knife to slice the tube down the side. Open it like a book and look inside.
You will often find soft, usable paint hiding behind a dried plug. Scoop out the good paint with a palette knife. Place it into a small airtight jar or container. Add a drop of water if it needs loosening. Now you have rescued paint and a fresh storage container.
Pros: You recover paint that no other method could reach. It gives the paint a better home than a damaged tube.
Cons: You cannot reuse the tube afterward. The paint dries faster in a jar unless you seal it very well.
What To Do With Fully Cured, Rubbery Paint
Sometimes the paint is truly gone, and that is okay. Fully cured acrylic has turned into solid plastic. You cannot melt it or dissolve it back into liquid paint. Accepting this saves you hours of wasted effort.
But do not toss it just yet, because cured paint has creative uses. Peel out the dried chunks and use them in mixed media art. Some artists glue dried acrylic skins onto canvas for texture.
Others use the colorful chunks in collage or resin projects. The paint failed as paint, but it can still add value. Think of it as a new material rather than trash, and you give it a second purpose.
Tools And Materials You Need For The Rescue
Gather your supplies before you begin, so the process runs smoothly. You do not need anything fancy or expensive. Most items are already in your home or studio.
Keep these basics ready: a cup of warm or distilled water, a small bottle of isopropyl alcohol, and a palette knife for mixing.
A clean cloth helps you grip stuck caps and wipe threads. You will also want a few small airtight jars for transferring rescued paint. Scissors or a craft knife handle tube cutting when needed.
Pros: These tools are cheap and reusable for future rescues. Having them ready prevents mid task delays.
Cons: Buying alcohol or jars adds a small cost. Sharp tools need careful handling to avoid cuts.
How To Test The Revived Paint Before Using It
Once you bring paint back to life, test it before painting your real project. Revived paint sometimes behaves differently than fresh paint. A quick test saves your artwork from surprises later.
Brush a small amount onto scrap paper or a test canvas. Check the color, the flow, and how smoothly it spreads. Let it dry fully and look for cracking, flaking, or weak coverage.
Paint that was over thinned with water may look patchy. If the test passes, use it with confidence. If it cracks or peels, save it for practice or rough sketches instead of finished pieces.
How To Prevent Acrylic Paint From Drying Out Again
Prevention is far easier than any rescue, so protect your tubes from the start. The main goal is keeping air and heat away from your paint. A few habits make a huge difference over time.
Always wipe the cap threads clean before you close the tube. Dried paint in the threads stops the cap from sealing tight. Store tubes in a cool, dry place between 65 and 75 degrees Fahrenheit.
A drop of water on the threads before sealing helps too. Some artists store tubes cap side down so the paint blocks the opening. These small steps keep your paint soft for years.
Best Storage Tricks To Keep Tubes Fresh Longer
Smart storage takes prevention one step further and extends paint life dramatically. Air is the enemy, so seal it out completely. Simple kitchen items do the job perfectly.
Place your sealed tubes inside a large zip top bag with a damp paper towel. The moisture keeps the air inside the bag humid and slows drying. Wrap a small piece of plastic wrap over the threads before capping for an extra seal.
Keep tubes away from sunlight, radiators, and hot windows. Heat speeds evaporation and ruins paint fast. Store similar colors together so you find them quickly and open them less often.
Common Mistakes To Avoid When Fixing Dried Paint
Many people make the same errors and ruin paint that could have been saved. Learning these mistakes helps you avoid them. A careful approach beats a rushed one every time.
The biggest mistake is adding too much water at once. This drowns the paint and weakens the color forever. Another error is using boiling water, which can damage the tube and the paint.
Forcing a stuck cap with too much strength often cracks the tube and spills paint everywhere. People also give up too soon on paint that was only mildly dried. Go slow, add small amounts, and test as you work for the best results.
Frequently Asked Questions
Can dried acrylic paint in a tube always be saved?
No, it depends on how dried the paint is. Soft or pasty paint comes back easily with water or alcohol. Fully cured, rubbery paint has turned waterproof and cannot return to liquid. Always check the texture first.
Is water or isopropyl alcohol better for reviving paint?
Water works best for mild, thick paint and keeps the paint nontoxic. Isopropyl alcohol handles tougher, half dried paint that water cannot soften. Start with water, then move to alcohol only if water fails.
Will revived acrylic paint work as well as fresh paint?
Sometimes, but not always. Lightly revived paint usually performs almost like new. Paint that was heavily thinned or partly cured may look patchy or crack. Always test it on scrap before using it on real artwork.
How do I open a tube cap that is stuck shut?
Soak the cap end in warm water for ten to fifteen minutes. The warmth softens the dried paint in the threads. Then grip the cap with a cloth for better hold and twist it open gently.
How long does acrylic paint last in the tube?
Unopened tubes can last several years when stored cool and sealed. Opened tubes last around two to five years with good care. Proper storage, clean threads, and tight caps stretch that life much longer.
Can I use cured acrylic paint chunks for anything?
Yes, dried acrylic still has value in art. Use the colorful chunks and skins in mixed media or collage. Some artists glue them onto canvas for texture. The paint failed as paint, but it works as a craft material.

Hi, I’m Zoe Ward, the creator and voice behind Fine Brush Vault. I’m passionate about art, painting, and exploring the world of colors. I spend my time testing and reviewing art supplies to help fellow creators find the best tools for their craft. Through honest reviews and detailed guides, my goal is to make your creative journey easier and more inspiring.