Amaco Rub ‘n Buff Antique Gold Review: Finish, Uses, and Verdict
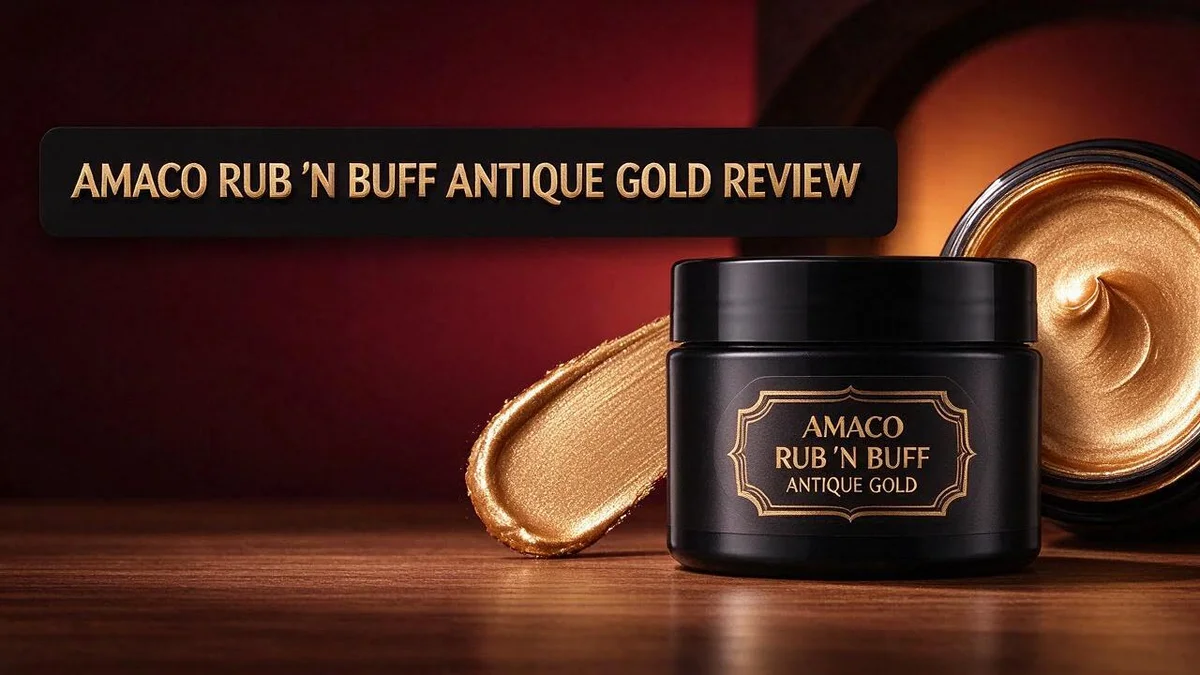
Ever wanted a gold finish without the mess? The Amaco Rub ‘n Buff in Antique Gold could be the answer. It gives your projects a warm, bright gold shine.
A little goes a long way. You only need a small amount on your fingertip. Then you rub it onto your piece. The finish dries in under an hour.
Crafters use this metallic wax to antique frames, stencil designs, and touch up worn metal. It also works well for restoring old gilding and creating vintage looks.
Compared with spray paint, this product feels far less messy. You keep your workspace cleaner. You also control the shine with every stroke.
Seller feedback is strong too. One listing shows a 99.8% positive rating.
In a Nutshell
- Warm, bright finish: The Antique Gold shade shows a warm, bright gold tone that catches light nicely. This color gives projects a rich glow without needing extra layers of paint.
- Quick drying time: This wax dries in under an hour, so you can move on to the next step sooner. A short drying time also helps you finish a piece in one session.
- Vintage style on demand: Use it to give new décor an aged look that feels rich and lived in. Many people enjoy how the color adds character to plain objects.
- Restores worn gilding: Older frames and furniture often lose their shine over time. This product helps bring back worn gilding so the piece looks cared for again.
- Useful on many surfaces: You can apply it to craft projects, stencil designs, and small home accents. One small container covers a surprising amount of work.
- Small size, big impact: The half ounce size is easy to store in a craft drawer. It stays ready whenever a project needs a little extra sparkle.
Warm Antique Gold Finish and Color

- A Little Goes a Long Way - Made from fine powders and carnauba wax, this 15 ml tube can cover up to 20 sq feet so you can work on several projects large and small. The wax buffs smoothly onto wood, metal, ceramic, glass and more
- Simple Application - Using a clean, dry finger or soft cloth and buffing motions, apply a small amount of Rub 'n Buff to your project and create subtle details or metallic finishes. Use it to embellish craft projects, cosplay costumes or accessories, frames and antiques
Some of the links on this website are affiliate links, which means that at no additional cost to you, I earn a commission if you click through and make a purchase. I only recommend products and services that I believe will add value to my readers. Thank you for your support!
The color does a lot of the work here. It sits in a sweet spot between soft honey and deep brass.
Base color changes everything. Rub it over a dark brown or black base and the gold looks richer. Over white or cream, the gold looks lighter and more playful.
Lighting also shapes how the finish looks. Near a window, the gold shows more shine. Under warm lamps, it can look softer and more golden.
Try a test patch first. Choose a scrap piece or the back of a frame. Rub a small amount and check the result in both daylight and room light.
Layering adds depth. Start with a darker wax or paint, then add this gold on top. Then wipe lightly with a soft cloth so the edges catch light.
Many crafters use a dry brush for control. A stiff brush helps push the color into grooves. It also keeps the gold away from smooth areas you want to stay clean.
Photos can fool you. Phone cameras often shift gold toward orange. Take a picture in natural light and compare it to the real object.
Matching other gold items takes patience. Brass hardware, gilt mirrors, and picture frames all vary. Hold the piece next to your project before you commit.
Wood tones also affect the outcome. Oak and walnut bring out warm reddish notes in the gold. Painted surfaces in cream or sage often make the shade look fresher.
The finish feels rich without looking fake. Subtle rubbing leaves gold in the high points and dark tones in the recesses. Light and dark areas work together. That contrast gives an aged look that feels authentic.
Think about the mood you want. A light touch suits modern rooms. A heavier layer fits a traditional setting with dark wood and velvet.
Take notes on each attempt. Write down the base color and number of coats. This helps you repeat the look later.
Application and Rub-On Technique
Getting ready makes the rubbing easier. Start with a clean surface. Wipe away dust, grease, and loose flakes. Let the piece dry completely before you begin.
Next, press a small amount of wax onto a soft cotton cloth. Rub it in small circles over the raised areas first. The metallic shine appears as you work.
Use light pressure. Heavy pressure pushes the wax into every crack. The surface then looks heavy instead of smooth.
Work in small sections. Finish one panel before you move on. This keeps the coverage even across the whole piece.
Edges and carved details need extra care. Use a cotton swab to reach tight corners. Press gently so the wax settles into each groove.
When stenciling, tape the stencil firmly in place. Dab the wax through the openings with a cloth. Lift the stencil slowly to keep edges sharp.
Buff for shine. Once the wax feels set, polish the surface with a clean, soft cloth. Use long and steady strokes. The buffing brings out the metallic glow.
Wipe away any extra wax. Leftover wax can leave smudges or a sticky film. A dry cloth usually removes it quickly.
Keep your cloths separate. Use a fresh cloth for each color. Mixing tones can create muddy patches on the finish.
Think about where the gold will rest. Raised edges catch the most wax, so they often look brightest. Recessed areas stay darker and add natural contrast.
Stop before you overwork it. Keep rubbing until the surface looks even. Too much handling can wear away the color you built.
Patience pays off in this step. Each light coat builds the look slowly. Rushing often leads to uneven shine and a rough finish.
Take a short break between sections. Step back and check the surface from several angles. This helps you spot missed spots early.
Close the lid tightly after each session. Clean wax stays soft and easy to use. Good storage saves time on your next project.
Clean your tools when you finish. A damp cloth removes wax from brushes and sponges. Dry them fully before storing.
Surfaces and Project Suitability
Surface choice shapes the final look. Every material grabs wax a little differently. Smooth surfaces show streaks faster, while textured surfaces hide small mistakes.
Raised bumps and ridges pick up the wax first. This can create a natural highlight that draws the eye.
Plaster and resin pieces can take the finish nicely. Sand them lightly first so the wax has something to grip. Wipe away dust before you begin.
Painted surfaces need a little patience. Let fresh paint cure fully before you rub. Soft paint can lift or smear under the cloth.
Glossy plastic needs a different plan. The wax may grip slick finishes less firmly. Scuff the surface gently with fine sandpaper first, then wipe it clean.
Metal projects suit this wax well. It works nicely on worn trim and candle holders. Wipe off any oil first.
Raw wood soaks up wax quickly. Seal the wood first if you want more control over the color. Keep a clean cloth nearby for quick fixes.
Fabric and paper need extra care. Wax can stiffen soft materials. Use only a tiny amount on small accents.
Think about how often people touch the piece. Items handled daily may show wear sooner. Shelf décor usually keeps its finish longer.
Outdoor items face rain, sun, and temperature swings. A wax finish may not hold up as well there. Indoor projects are a safer choice.
Plan the order of each step. Work on the least visible parts first. Save the main face for last so it stays clean.
Mixed materials need smart planning. A metal handle on a wooden box may take the color differently. Treat each material as its own test.
Match the material to your goal. Think about the material and the look you want. Each choice shapes the final result.
The right surface makes the difference. Pick materials that suit the wax, prep them well, and enjoy the aged gold glow. Your project will look richer for it.
Top 3 Alternatives
Looking for a metallic finish that feels fresh? These three options give you a shiny look without much fuss. Each one works well for small crafts and larger home projects.
Modern Masters Metallic

Some of the links on this website are affiliate links, which means that at no additional cost to you, I earn a commission if you click through and make a purchase. I only recommend products and services that I believe will add value to my readers. Thank you for your support!
Modern Masters Metallic comes in many rich shades. It goes on smooth and dries to a bright sheen.
You can brush or roll it onto wood, metal, and plaster. Two thin coats usually give the best result. Let each coat dry fully before you add the next one.
Martha Stewart Metallic

- Set includes 6 multi-surface gilded metallic 2 oz acrylic paints
- Highly pigmented color provides superior shine

Some of the links on this website are affiliate links, which means that at no additional cost to you, I earn a commission if you click through and make a purchase. I only recommend products and services that I believe will add value to my readers. Thank you for your support!
The Martha Stewart Metallic line is a good pick for beginners. The colors are easy to mix and layer.
A sponge or soft brush gives a soft, worn look. You can also use it on paper crafts and small décor pieces.
Krylon Metallic Paint

- Made in United States
Some of the links on this website are affiliate links, which means that at no additional cost to you, I earn a commission if you click through and make a purchase. I only recommend products and services that I believe will add value to my readers. Thank you for your support!
Krylon Metallic Paint comes in a spray can. It covers large areas quickly.
Hold the can about 12 inches away from your project. Move in steady strokes. Spray in light coats to avoid drips.
Work in a well-ventilated area. Let the paint cure before you handle the piece.
Choose the option that fits your project best. Think about your surface, your skill level, and how much area you need to cover. Each option gives a lovely metallic finish. Try one on a small piece first to see how it looks.
Coverage, Drying Time, and Longevity
Coverage starts with the jar size. This 0.5 oz tin suits small craft jobs and detail work well.
Think of the wax as a finishing touch, not a thick paint. You only need a thin film to show the gold.
Plan your coverage before you begin. Estimate how many pieces you want to finish in one session.
Large furniture pieces may need more than one tin. Keep a second jar nearby for bigger jobs.
Drying time feels quick compared with many paints. The wax sets in under an hour in most cases.
Room temperature and humidity can speed or slow the set. A warm, dry room usually helps the process.
Use the wait time to prep your next piece. Gather cloths, labels, and painter’s tape ahead of time.
Do not rush the set. Soft wax can smear onto nearby areas and leave streaks you must fix.
Drying time also shapes your schedule. Apply in the morning so the wax sets before evening use.
Make a quick plan for each session. Note how many pieces you can finish before the wax needs time.
Longevity depends on how the wax meets daily life. Indoor décor often holds its look well over time.
Protect the jar too. Replace the lid right after each use so the wax stays soft and workable.
Longevity also depends on how you store leftover projects. Keep finished pieces in a dry spot away from heavy heat.
Sunlight can fade surfaces over many years, so display pieces away from direct light.
Refresh worn spots with a light new layer. Blend the fresh wax into the surrounding gold for a seamless fix.
Keep notes on which projects wear fastest. This helps you plan future finishes with more confidence.
Small habits make a big difference over time. Store your cloths and jar together so nothing dries out.
A clean cloth also keeps the gold looking bright longer.
Your next project will go even smoother. Each piece teaches you a little more about the finish.
Pros and Cons
Pros
- A little goes a long way.
- It rubs on to a metallic shine.
- It is less messy than spray paint.
- One eBay listing shows 99.8% positive seller feedback.
- It works well for vintage looks and restoring worn gilding.
Cons
- It takes some practice to get an even finish.
- Fine detail work can feel slow and fiddly.
- It will not fix deep scratches or dents.
- Adding other shades means buying more tins.
Who Should Buy It
Not every crafter will feel the same about this wax. Think about your skills, your style, and your project goals before you decide.
Hobbyists who love small, hands-on projects often enjoy it most. Picture a quiet afternoon with a picture frame, a set of drawer pulls, or a few decorative boxes. The wax suits these tasks well, and each piece gets a little extra character.
Home decorators who want a lived-in look also benefit. A gold edge on a mirror or a warm glow on a lamp base can make a room feel settled and cozy. This wax helps you create that mood without a full renovation.
Renters who want a fresh look often like this option too. Small accents on existing pieces can refresh a space. You can try a corner or a single shelf first, then decide if you want more.
Teachers and parents running craft days may find it useful too. Adults can guide younger helpers through simple stenciling, and the group can share one small tin. A clear plan keeps the work area organized and the mood fun.
Gift makers can also use it. A small tin can add a metallic touch to a monogram, a trinket box, or a photo frame. Each gift gets a personal feel that people notice right away.
Some shoppers should look elsewhere. If you need a solid, even color across a large cabinet or wall, this wax may feel slow. It shines most on smaller surfaces and decorative details.
Buyers who want a sleek, modern finish may prefer a clean paint. The antique gold tone leans traditional, so it can clash with minimalist decor. Choose a different shade if your room uses cool, simple lines.
Finally, experimenters will get the most joy here. Layering and blending different textures can create unique results. Every piece tells a slightly different story, and that is part of the fun.
Final Verdict
Our final take is simple. Amaco Rub ‘n Buff Antique Gold is a strong choice for small craft projects and vintage touch up work. It delivers a warm, bright gold tone. Many surfaces look richer after a light rub. Most people will enjoy using it.
Think of this wax as a tool for detail rather than full coverage. It shines on trim, edges, and small accents. Those spots reward a patient and steady hand.
Choose this product when you want depth and age. Wax settles into carvings, moldings, and stenciled patterns. The piece then looks like it has lived a long life.
Skip it when you need a flawless and uniform finish. Large flat areas may show streaks or patchy spots. A paint or spray product may suit those jobs better.
The research lists no cons, yet real projects still bring a few surprises. Your first session may feel uneven, so expect a learning curve.
Test the wax on a scrap piece first. This simple step saves frustration. It also builds confidence before you work on a favorite heirloom.
Keep your expectations realistic and your pace relaxed. Light passes often look better than heavy ones. Patience turns a simple project into a lovely result.
In the end, this wax earns a place in your craft kit. Its warm gold glow can change a plain object into something special.
Pick it for character, not perfection. That mindset makes the most of what this tin does best.
Buyers who weigh their options should compare the finish with their goals. Ask whether you want subtle shine or bold coverage. Your answer will guide the right choice.
This wax rewards curiosity. Experiment on different textures and see what happens. Many people discover new favorite techniques along the way.
Overall, the product offers a balance of ease and charm. It may not suit every project, but it fills a clear niche very well.
Give it a try on your next weekend project.
Frequently Asked Questions
How long does the wax take to dry?
The wax dries in under an hour. Keep your hands off the piece while it sets. Plan your session so you can leave the project alone for a while.
What tools do I need to start?
Most people only need their fingertips or a soft cloth. A small brush can help you reach tight stencil edges. Keep a dry rag nearby to wipe away extra wax before it sets.
Is this wax safe for children to use?
The research does not list safety details for kids. Always read the label before a child joins in. Keep an adult close by, and let younger helpers work on small, simple pieces.
What does the color look like on a finished piece?
The wax gives a warm, bright gold tone. Light rubbing leaves a soft shine. Heavier rubbing in the recesses can add a deeper, aged look that many crafters enjoy.

Hi, I’m Zoe Ward, the creator and voice behind Fine Brush Vault. I’m passionate about art, painting, and exploring the world of colors. I spend my time testing and reviewing art supplies to help fellow creators find the best tools for their craft. Through honest reviews and detailed guides, my goal is to make your creative journey easier and more inspiring.